Table of Contents
- 6. Configuration
- 6.1. Data model
- 6.2. Configurable data model
- 6.3. Packages
- 6.4. Routes
- 6.5. Device Settings
6. Configuration
6.1. Data model
Data collection begins with the creation of a Data Model in SMART Desktop. The Data Model defines the data which SMART Mobile will collect.
More information can be found in the SMART Essentials Handbook in the SMART Resource Library: https://smartconservationtools.org/Resources/Resource-library
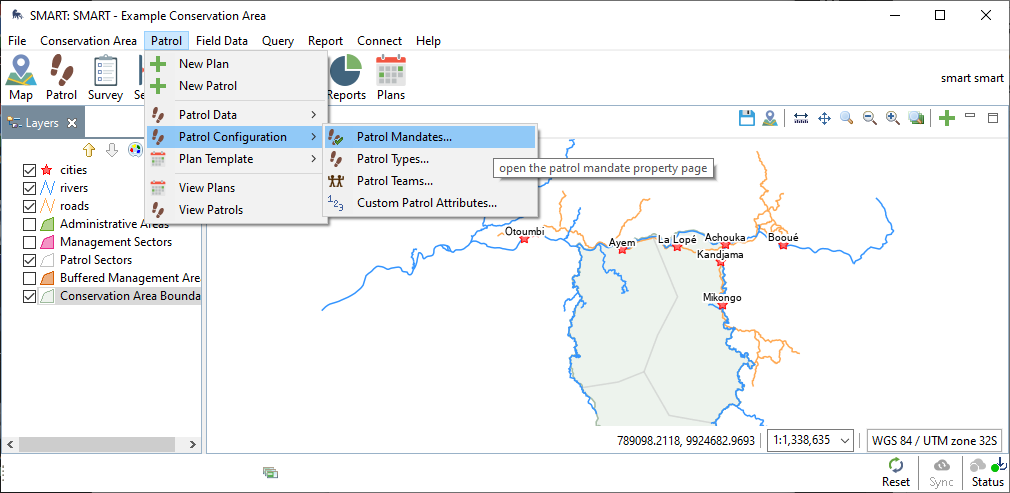
The Data Model editor can be reached from the Conservation Area menu:
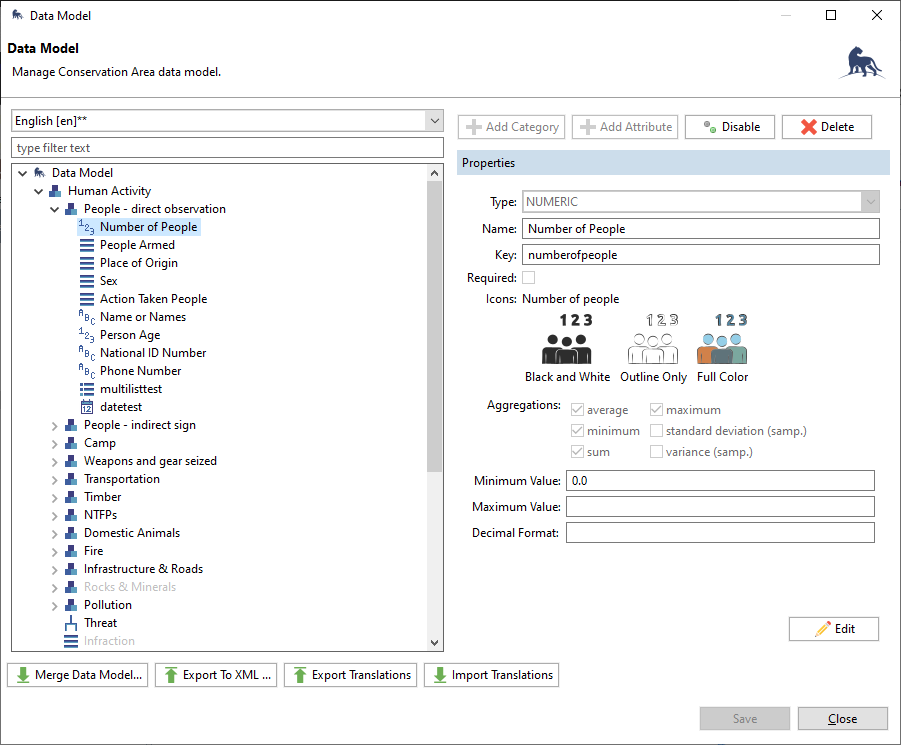 |
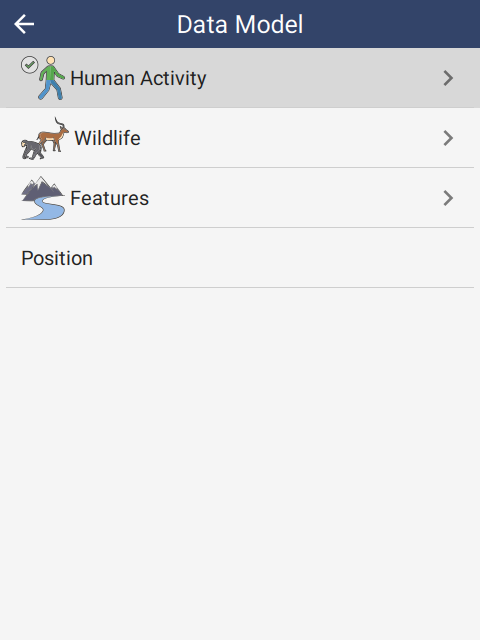
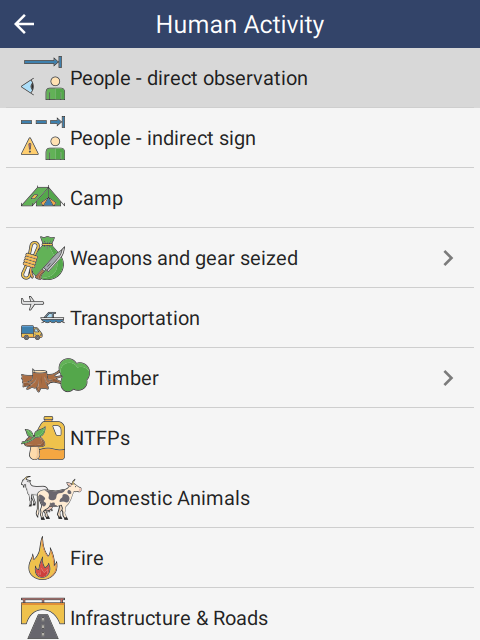
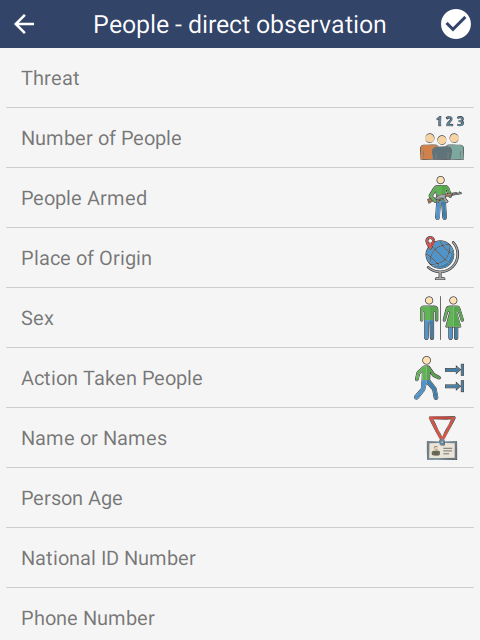
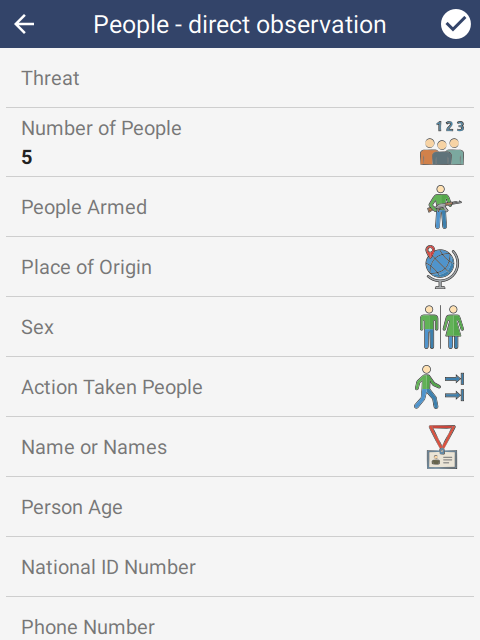
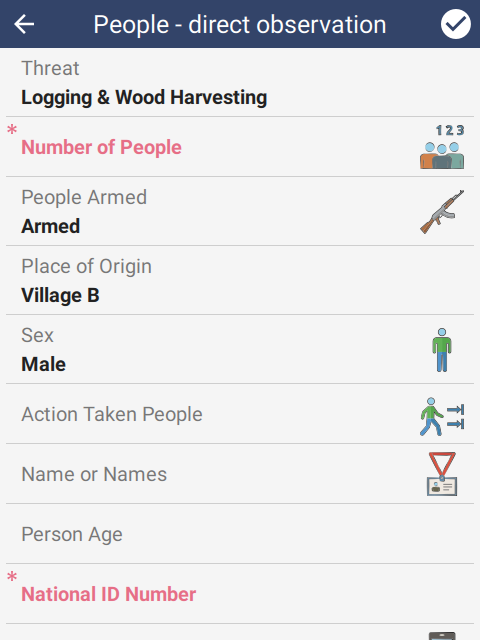
The Data Model is organized as a hierarchy. SMART Mobile users will drill into Categories until reaching a set of Attributes. For example, the Human Activity -> People - direct observation category will show the attributes Threat, Number of People, People Armed, etc.
Note: while Threat is not in the People - direct observation category, it is in the Human Activity Category and is therefore part of the required attributes:
 |  |  |
6.1.1. Category
The Data Model is organized as a hierarchy with Categories and Attributes. Categories are used for grouping (they can contain other Categories) and they can contain Attributes.
Categories have an icon and a name for display.
6.1.2. Attribute
Attributes are data values that SMART Mobile collects, e.g. a number, a note, etc. An Attribute has a type which governs what kind of data it can hold. The supported types are:
- NUMERIC - numbers
- TEXT - for text
- LIST - a single select list of options
- MULTI LIST - a check list of options
- TREE - a hierarchical single select list
- BOOLEAN - an on/off or yes/no value
- DATE - a date value
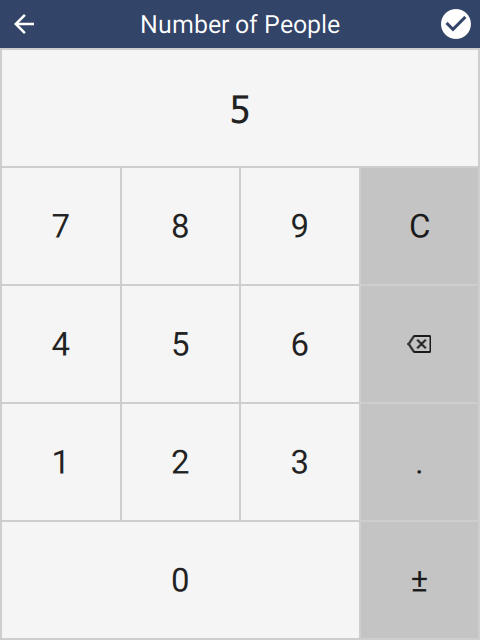
6.1.2.1. NUMERIC
Numeric attributes are collected with a keypad. Once the number has been entered, tap the check in the top right corner of the screen:
 |  |
6.1.2.2. TEXT
Text attributes are collected using a full screen text editor. The keyboard will pop up from the bottom of the screen:
 |  |
6.1.2.3. LIST
List attributes allow the selection of a single option from a list:
 |  |
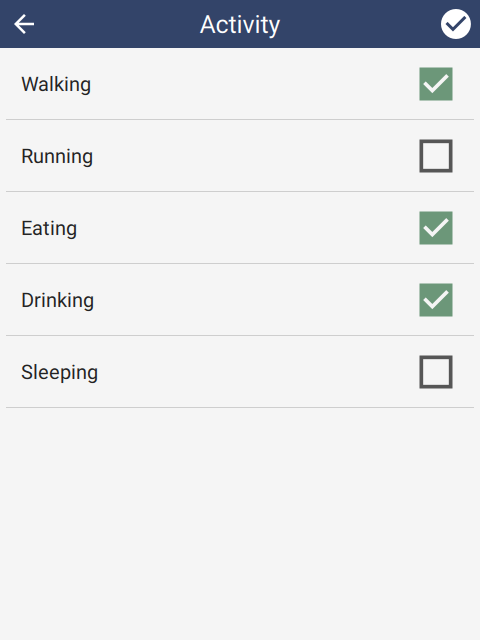
6.1.2.4. MULTI LIST
Multi list attributes allow selection of multiple options from a list:
 |  |
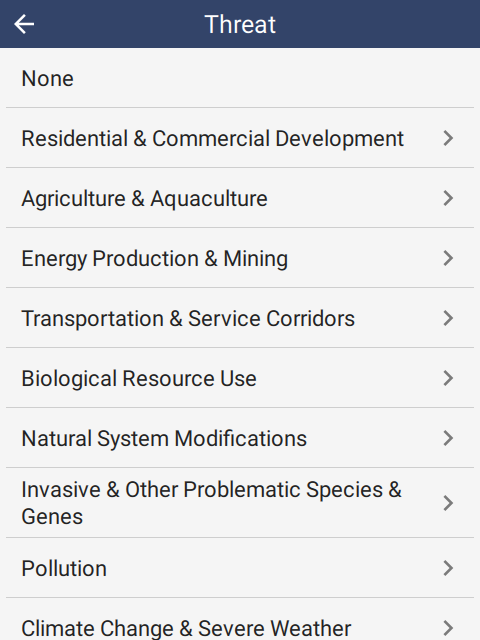
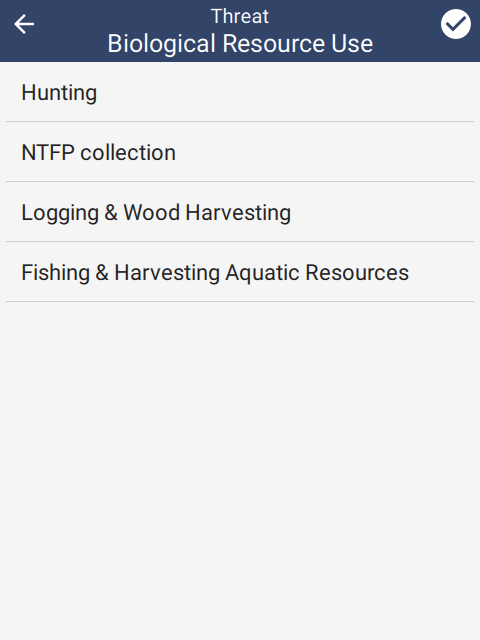
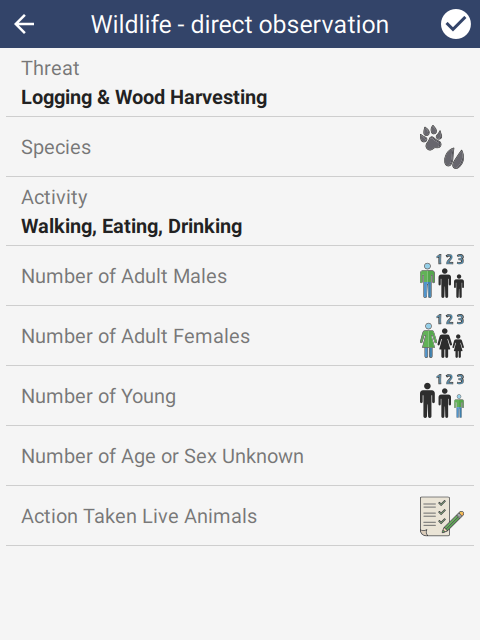
6.1.2.5. TREE
Tree attributes allow selection of a single option from within a categorized tree of options. For example, selecting Biological Resource Use and then Logging & Wood Harvesting:
 |  |  |
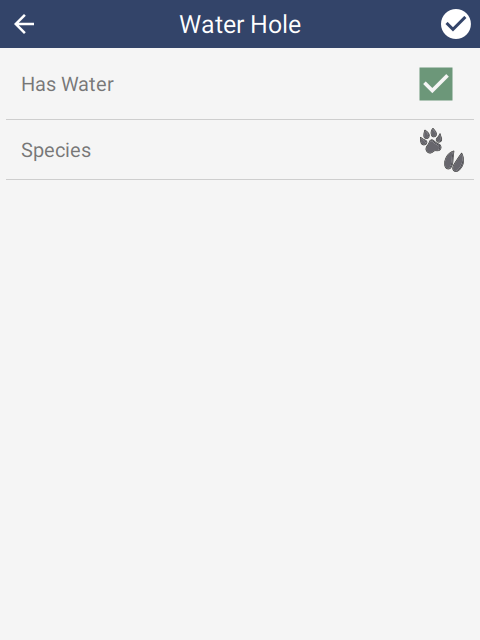
6.1.2.6. BOOLEAN
Boolean attributes allow selection of an on/off or yes/no type of value:
 |
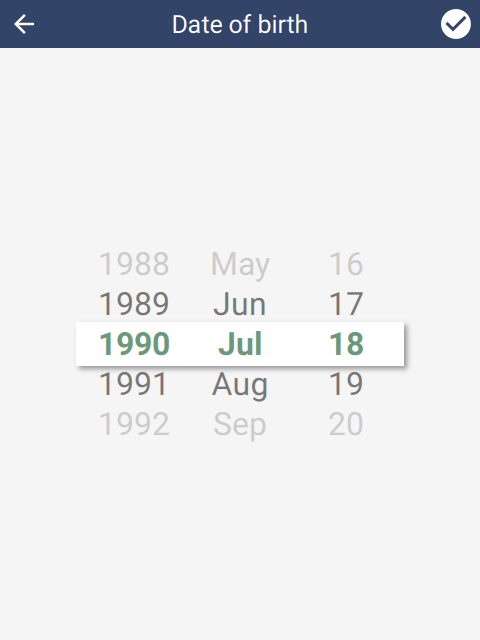
6.1.2.7. DATE
Date attributes allow selection of a date:
 |  |
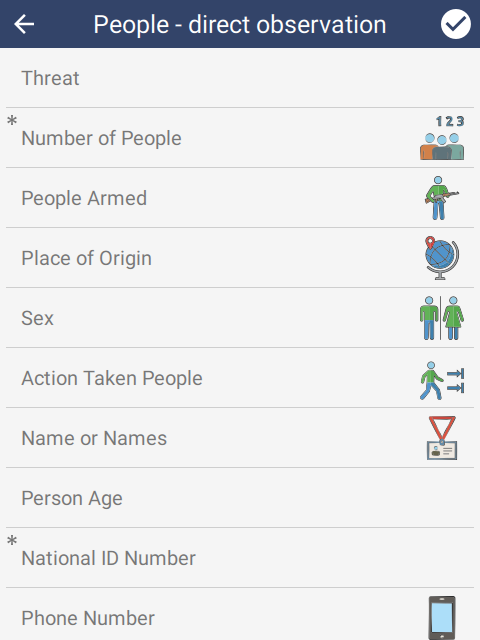
6.1.3. Required
Attributes can be marked as Required. This means that values must be set in order to save the observation. Attributes are marked with a ‘*‘ in the top left corner to indicate that they are required. If the check in the top right corner is pressed and a required attribute is not properly set, then that attribute will be highlighted in red.
 |  |
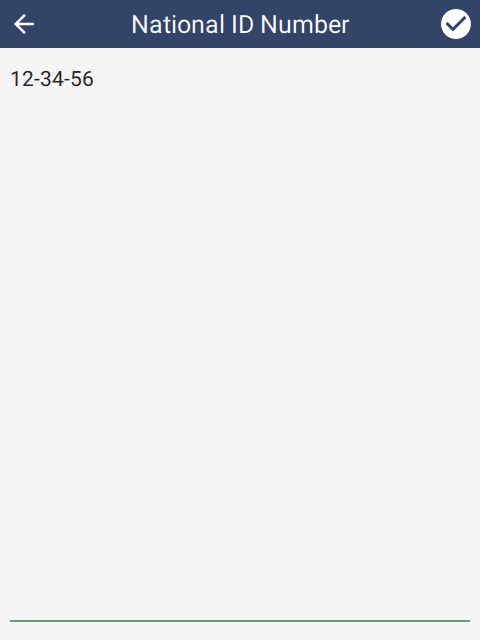
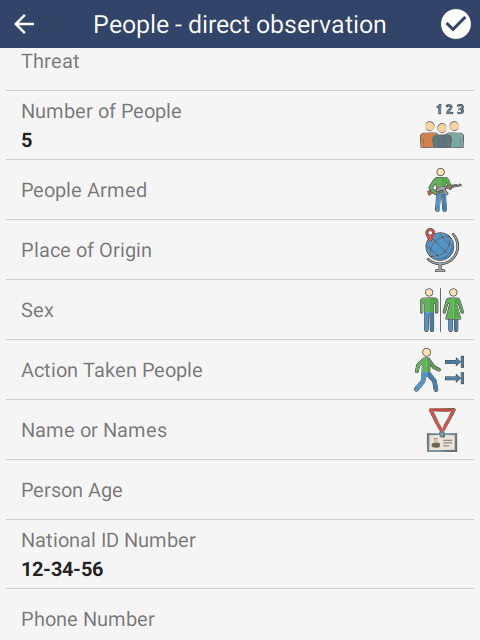
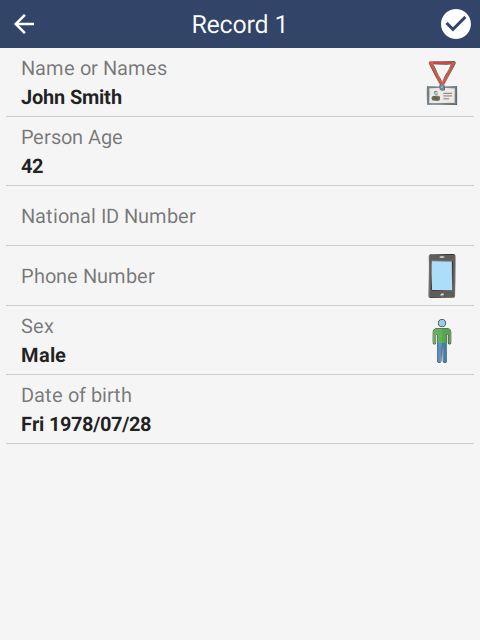
6.1.4. Regular expression validation
Attributes can also be validated with a regular expression. This is a test which must pass in order for the attribute value to be considered valid. For example, if the National ID Number must be of the form 12-34-56, i.e. number number dash number number dash number number, then the expression would be “(\d){2}-(\d){2}-(\d){2}”.
Regular expressions are a well known term in computing and more about them can be found here: https://en.wikipedia.org/wiki/Regular_expression.
A good online tool for creating regular expressions can be found here: https://regex101.com. SMART Mobile requires the expression to be Perl Compatible (PCRE2), so ensure that is set as the Flavor.
6.2. Configurable data model
The Configurable Data Model allows an additional layer of customization over the Data Model (see above). This is helpful when choosing which subset of data needs collecting using SMART Mobile.
More information can be found in the SMART Essentials Handbook in the SMART Resource Library: https://smartconservationtools.org/Resources/Resource-library
6.2.1. Top level Group
The topmost Group contains options which apply to the entire model:
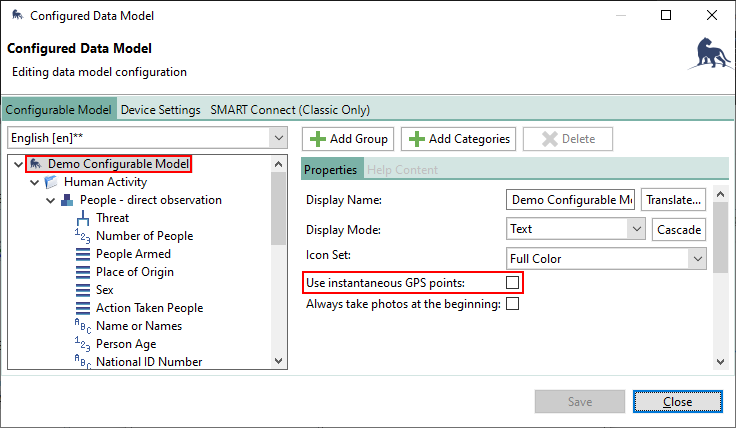 |
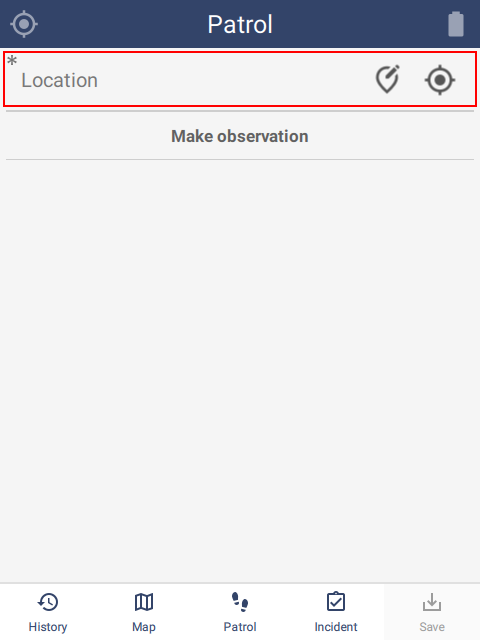
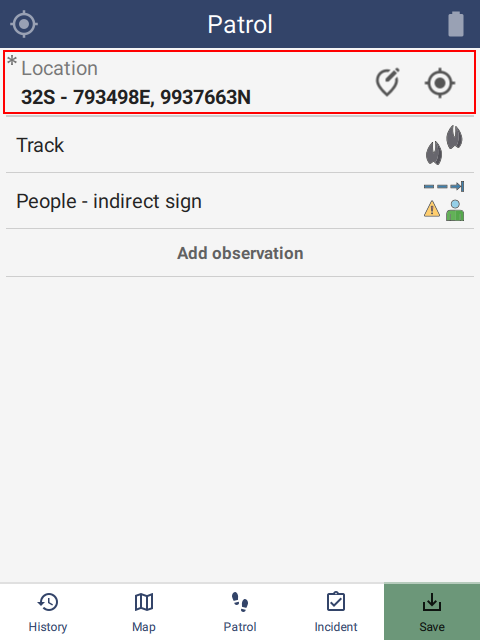
SMART Mobile respects Use instantaneous GPS points. When this option is checked, SMART Mobile will display a location editor bar on the observation home screen, just below the title. This allows users to choose when to take a GPS point, regardless of how long it will take to enter data:
 |  |
6.2.2. Group
Groups provide a way to organize the model so that users can navigate to the attributes that need to be collected. Groups can contain subgroups and can have a custom icon.
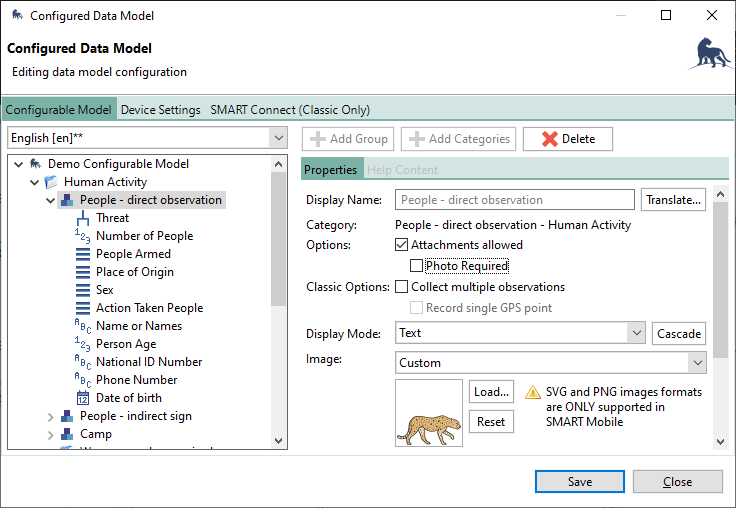
6.2.3. Category
Selecting a Category primarily allows configuration of the attachments. Note that Photo Required will force the user to take a picture in order to save the observation:
 |
6.2.3.1. Photos
Photos are taken by tapping on the camera icon at the top of the Attribute list (see below). Each time a picture is taken, another picture icon will appear to the right. If the picture list exceeds the width of the screen, they can be scrolled using a side swipe gesture.
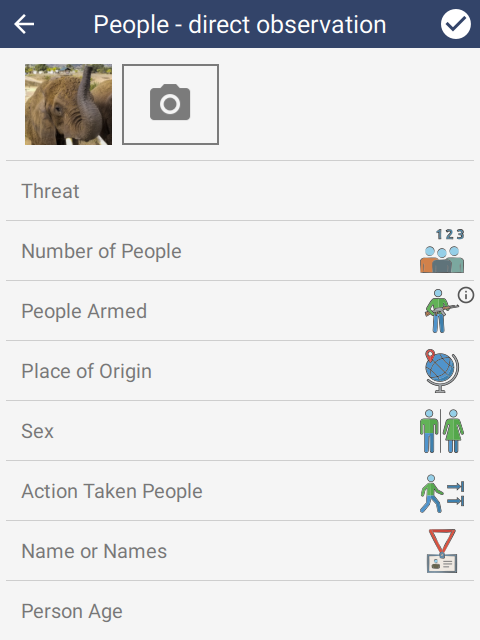 |  |
The icons along the bottom of the photo capture screen are:
- Flash mode - on, off and automatic
- White balance - automatic or disabled
- Capture - icon changes depending on the state:
- Capture - for first capture
- Recapture - retake the shot
- Delete - delete the current image and retake the shot
- Open existing image - use an image from the gallery
- Switch to back or front camera
To delete previously taken photos, tap the photo and then click Delete (trash icon) in the bottom middle of the screen. Click Yes, delete it on the prompt.
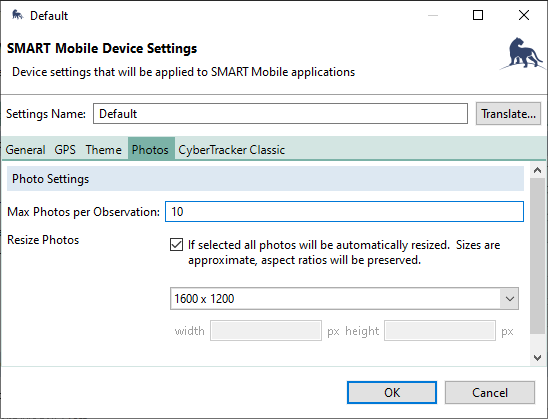
6.2.3.1.1. Additional photo settings
Photo settings can be further configured in SMART Mobile Device Settings. This allows control over the maximum number of photos and also whether to resize them. Resizing photos is recommended to reduce the burden on the database as large photos are relatively expensive. If a resize is not specified, then SMART Mobile will automatically size photos to 1600x1200:
 |
6.2.3.2. Audio recording
Audio recording is activated when Attachments allowed is enabled for a category. The audio recorder widget is shown below all other Attributes.
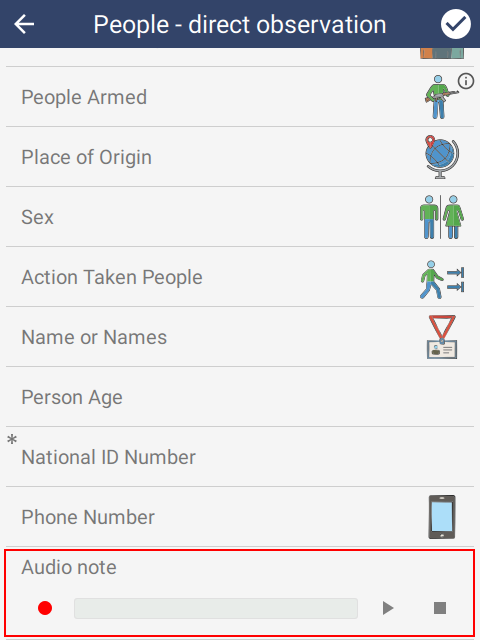 | 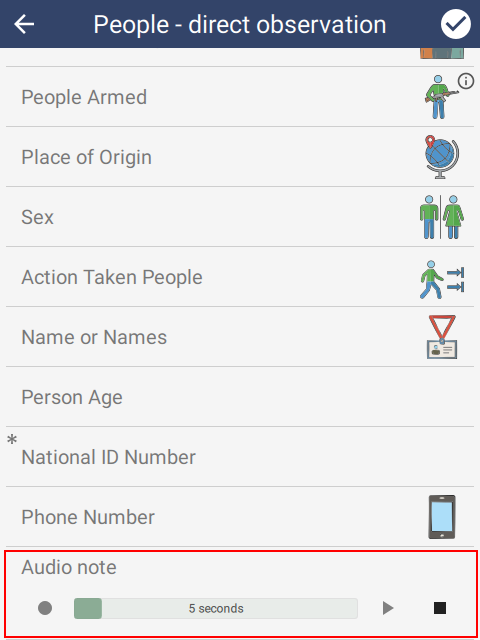 | 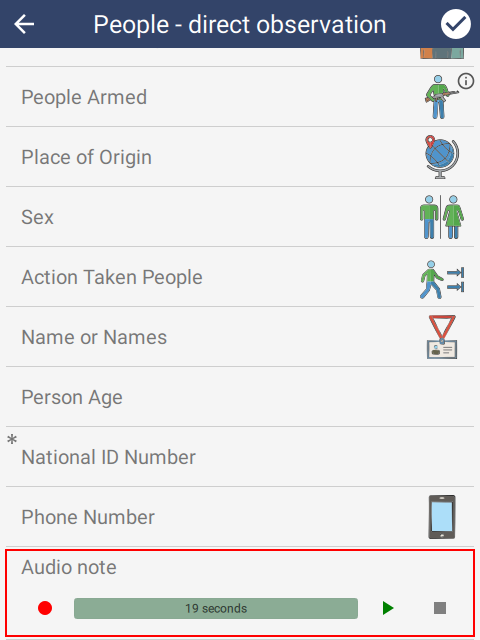 |
The buttons are:
- Red dot - start recording
- Play button - play existing recording through the speakers
- Stop button - stops recording or playback
To delete an audio recording, swipe the widget to the left and tap Yes.
6.2.4. Attribute
Attributes can be further customized in the Configurable Model. While the options vary according to the attribute type, all attributes support the following:
- Image - override the icon from the data model
- Enabled - specify when the attribute should be shown
- Always - attribute is always active
- Never - attribute is invisible and cannot be changed
- Custom - specify when the attribute is visible based on other attribute values
- Default value - the default value for the attribute
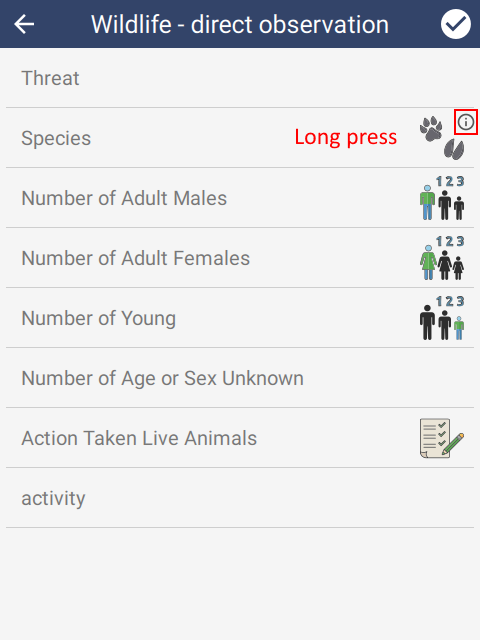
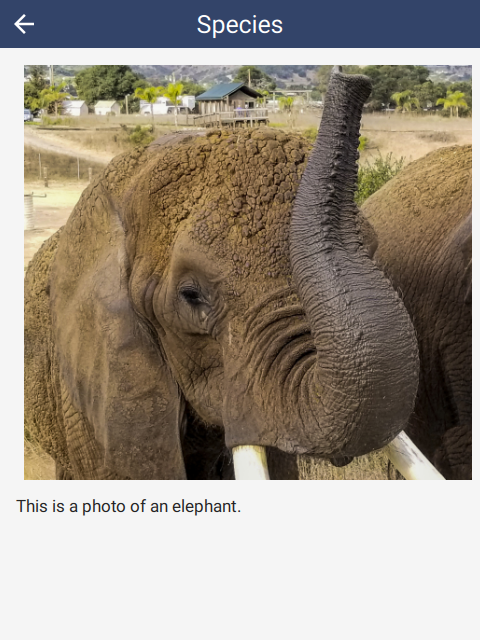
6.2.4.1. Help content
Help content can also be specified for attributes:
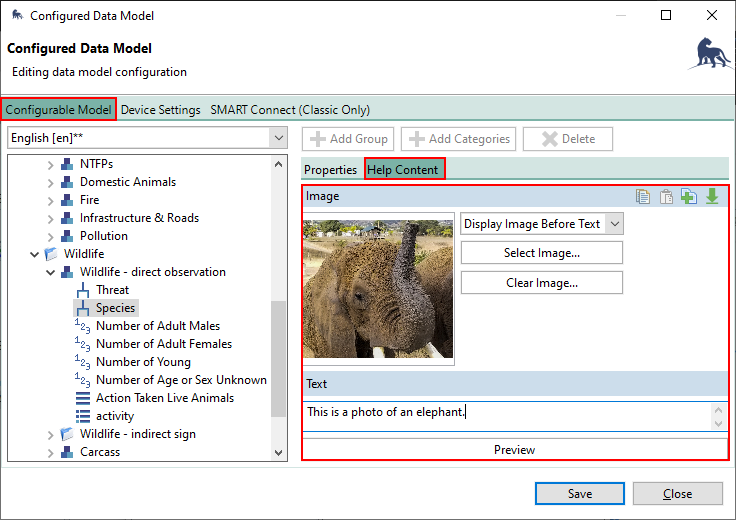 |
Tapping on the small ‘i’ icon on the top right of the Species row will show the help content. A long-press on the Species row will also show the help content.
 |  |
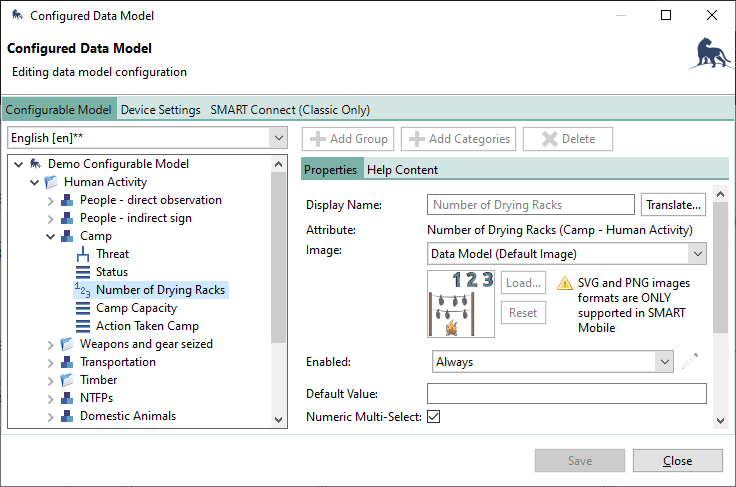
6.2.4.2. NUMERIC
Numeric Multi-Select can be checked on a NUMERIC attribute. This requires that the previous attribute be a LIST attribute with the Multiple Observations property checked (see LIST attribute below).
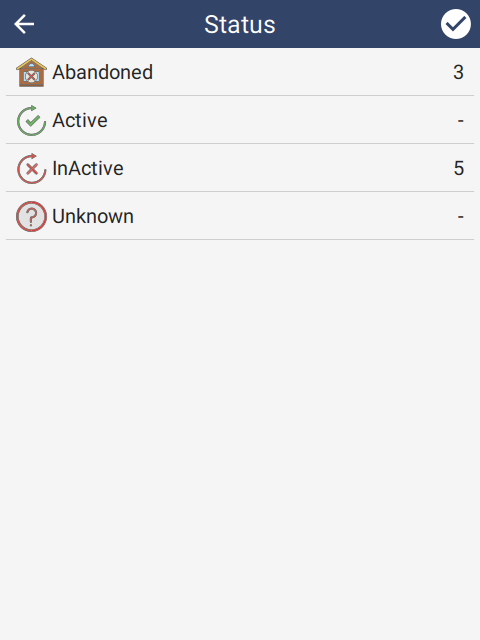
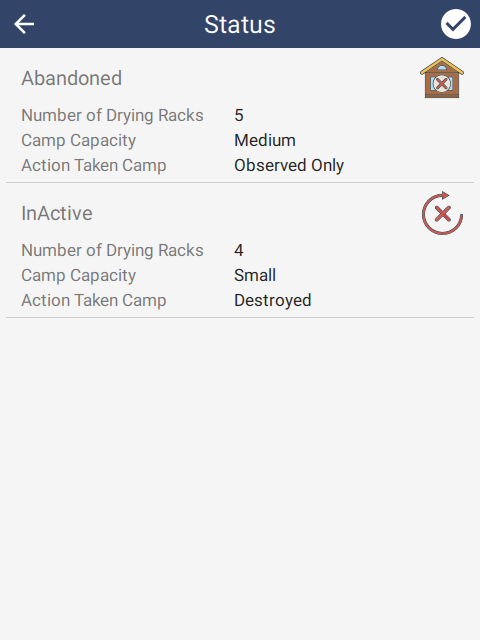
In the example below, there will be four sub-records: Abandoned, Active, Inactive and Unknown. Each of these will support entry of all subsequent attributes in the Category:
 |
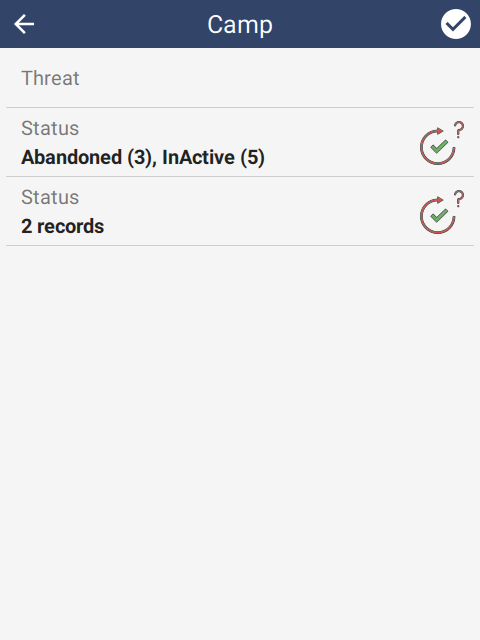
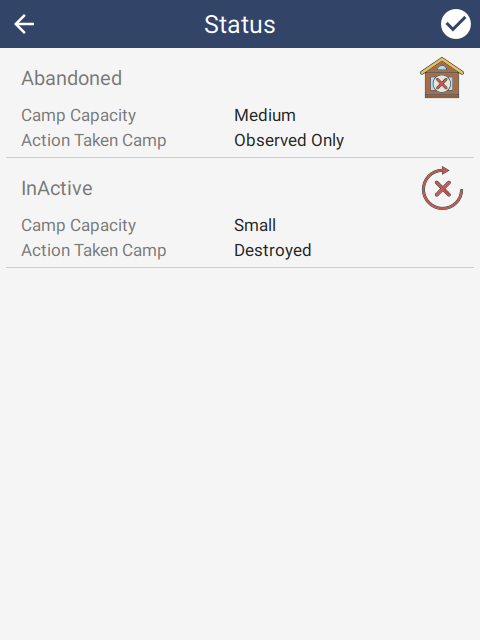
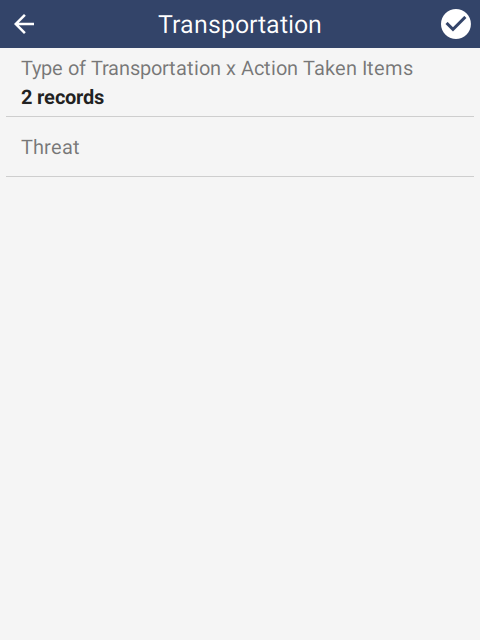
This transforms the prior list (Status) into a number list. For each specified item, all subsequent fields (i.e. Camp Capacity & Action Taken Camp) can be entered into a Record. In the example below, since two items were specified as non-zero, the second Status attribute reads “2 records”. Tapping on this row will allow entry of subsequent attributes for each of the specified items.
 |  |  |
6.2.4.3. TEXT
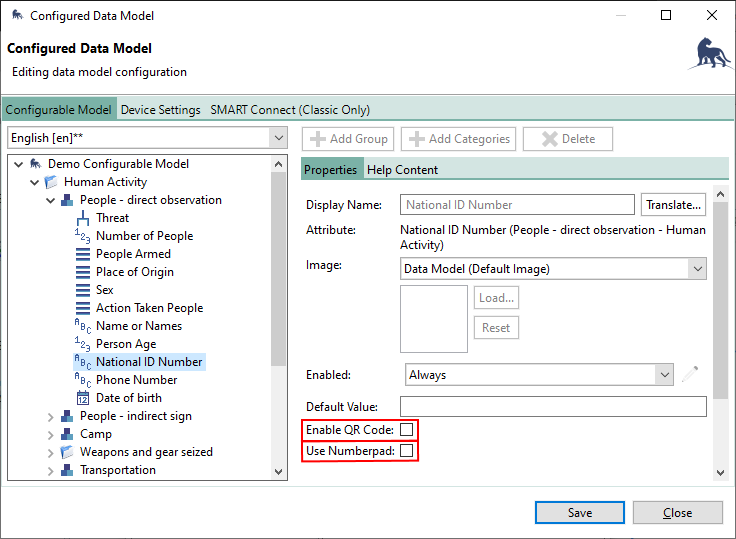
Text attributes can contain any kind of text. If the text comes from a QR code, check the Enable QR Code option. This will activate a barcode scanner on the device for this attribute. The following barcode formats are supported: QRCODE, EAN 13, CODE 39, CODE 128, CODE 128 GS1.
Use Numberpad will cause SMART Mobile to trigger the number keypad (instead of a full text keyboard) as the text editor on the device.
 |
6.2.4.4. LIST
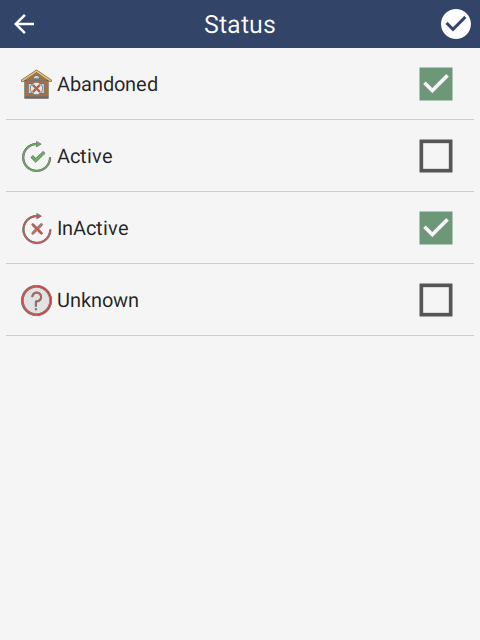
Multiple Observations is a feature which allows several records to be captured in a single observation - one for each item in the list. In the example below, there will be four sub-records: Abandoned, Active, Inactive and Unknown. Each of these will support entry of all subsequent attributes in the Category:
 |
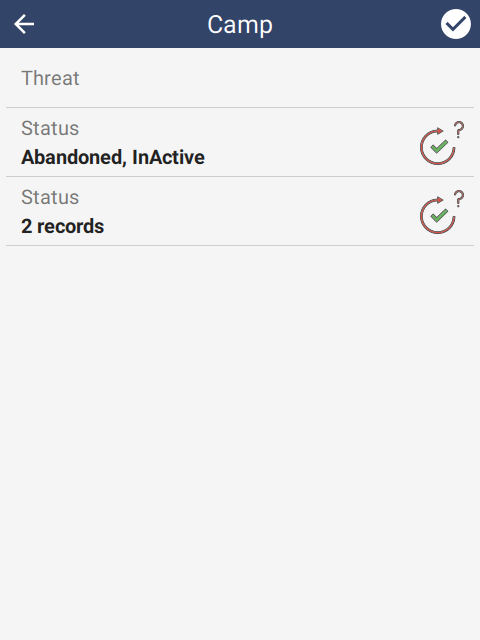
This transforms the list into a multi list. For each selected item, all subsequent fields (i.e. Number of Drying Racks, Camp Capacity & Action Taken Camp) can be entered into a Record. In the example below, since two items were checked, the second Status attribute reads “2 records”. Tapping on this row will allow entry of subsequent attributes for each of the checked items.
 |  |  |
6.2.4.5. TREE
Tree attributes have an additional property called Convert to List. This will flatten the tree into a single select list.
6.2.4.6. Attribute Groups
Attribute groups or matrices can be created by selecting multiple attributes together (holding down the control key while clicking on them), then right clicking the mouse and selecting Add to Attribute Group. This creates a matrix using the LIST attributes - each LIST attribute will add an additional dimension. In the case below, there are two LIST attributes, so it will be a two dimensional matrix:
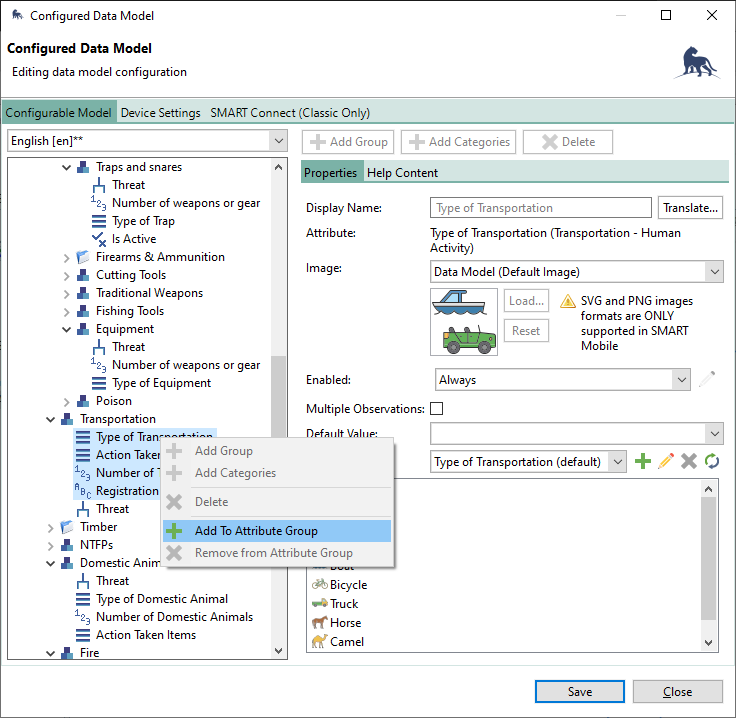 |
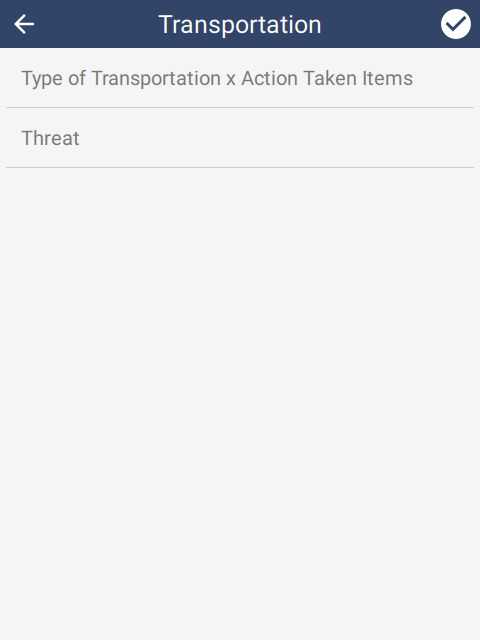 | 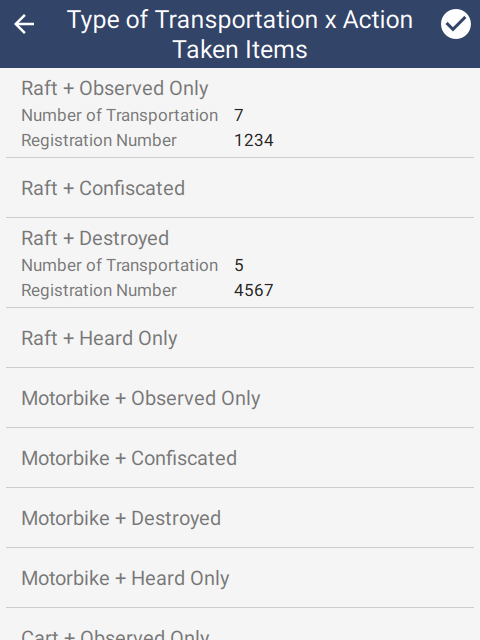 |  |
6.2.5. Collect multiple observations
SMART Mobile supports collection of compound observations using the Collect multiple observations feature.This is enabled at the Category level:
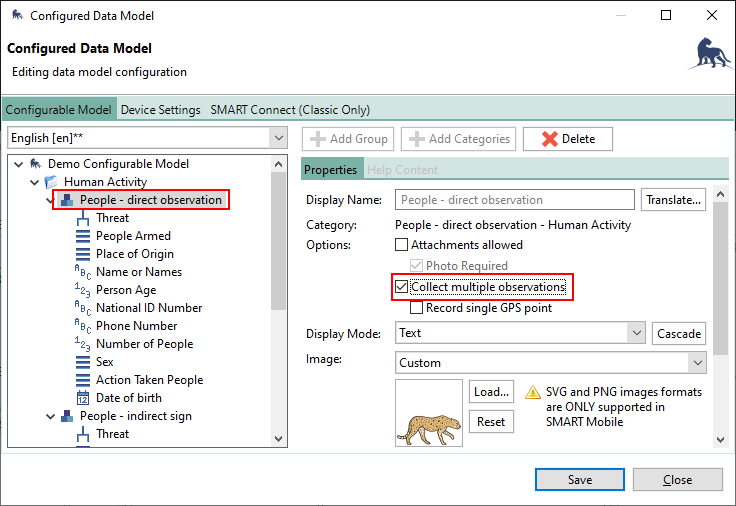 |
Once enabled, attributes have an additional property called Enter once with the options Disabled, At the beginning and At the end.
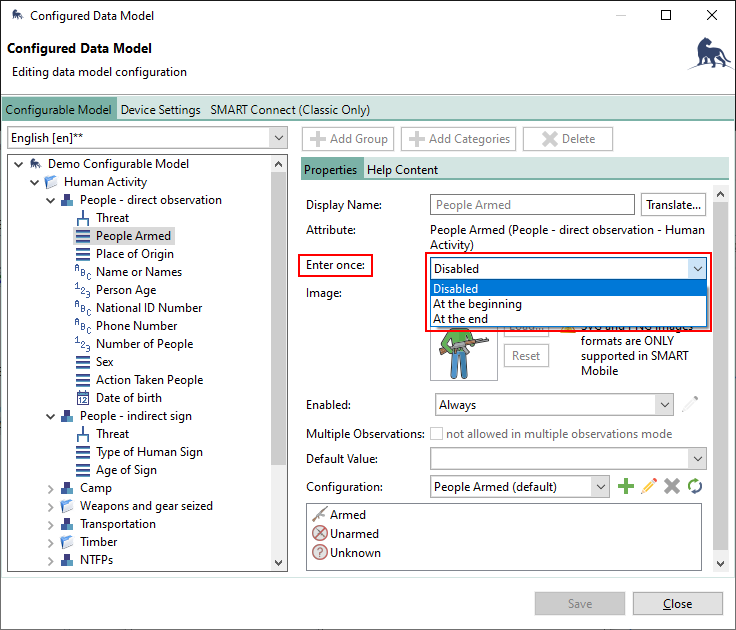 |
At the beginning and At the end specify that the attribute will not be repeated and will be asked only once for the incident - either at the beginning or end.
If Enter once is set to Disabled then the attribute will be replicated.
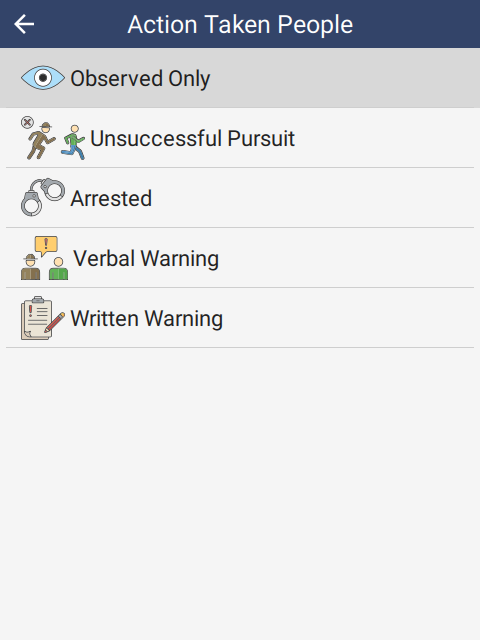
In this example, Threat, People Armed & Place of Origin are set to At the beginning and Action Taken People is set to At the end. All other attributes are set to Disabled.
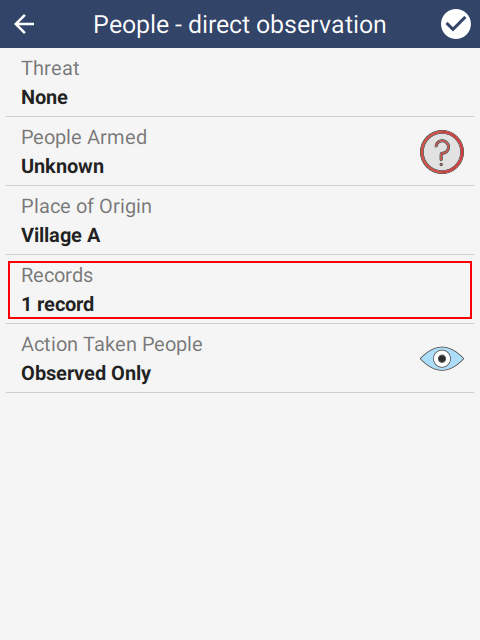 | 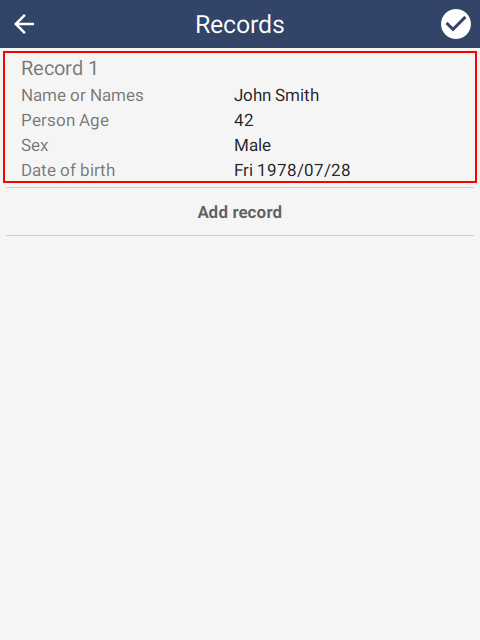 |  |
6.2.6. Data Collection Options
The Data Collection Options dialog provides several additional settings for data collection. It can be reached using the Field Data Options… option on the Field Data menu.
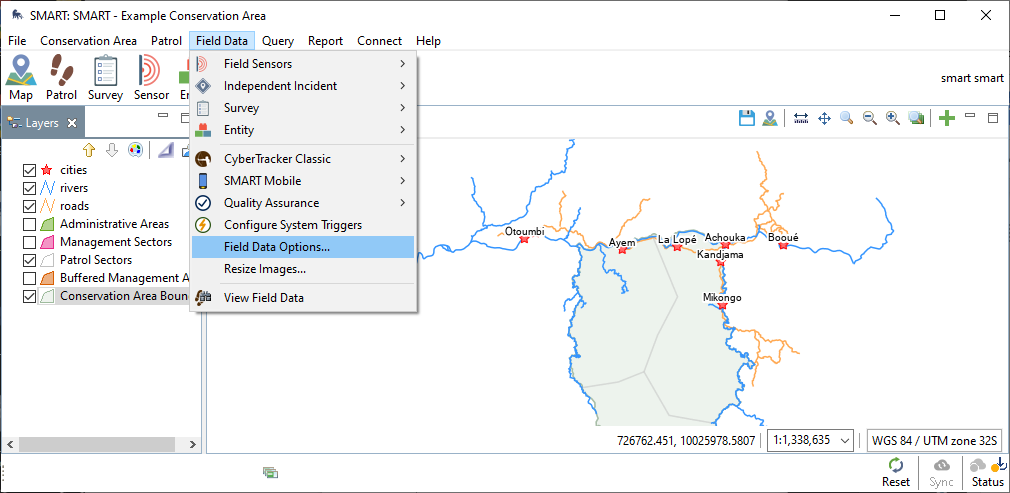 |
The dialog supports signature configuration, activation of distance and bearing and a feature to allow the user to be specified for each incident.
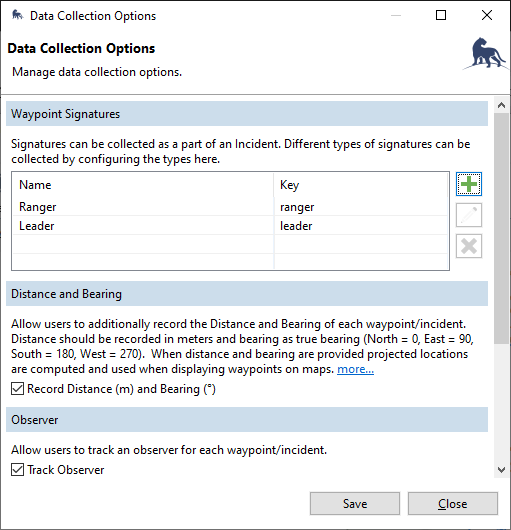 |
6.2.6.1. Signatures
SMART Mobile can capture signatures as part of an incident. Once configured on the Data Collection Options dialog, they can be enabled on the Configured Data Model dialog for a category:
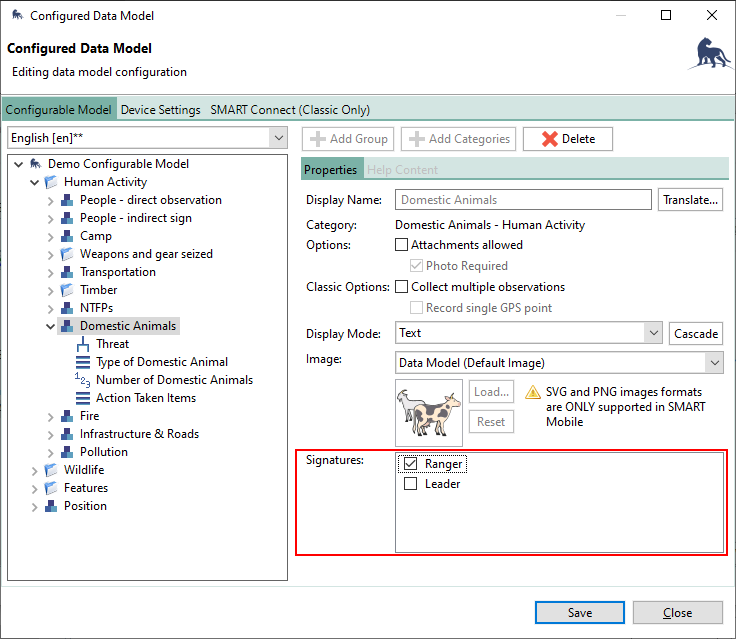 |
In SMART Mobile, the signature can be entered by drawing on a canvas. The trash icon will clear the canvas:
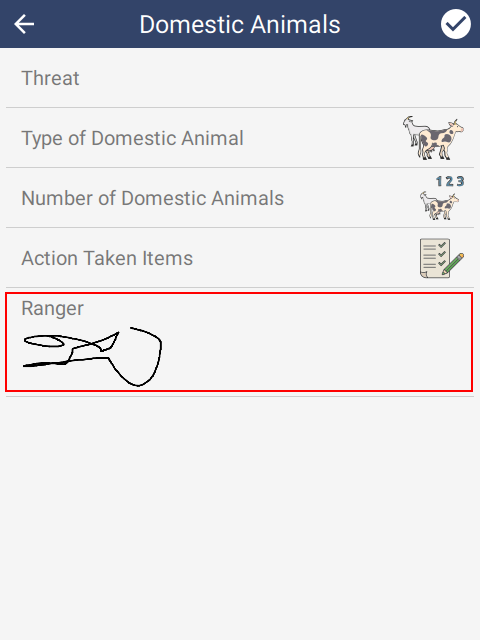 | 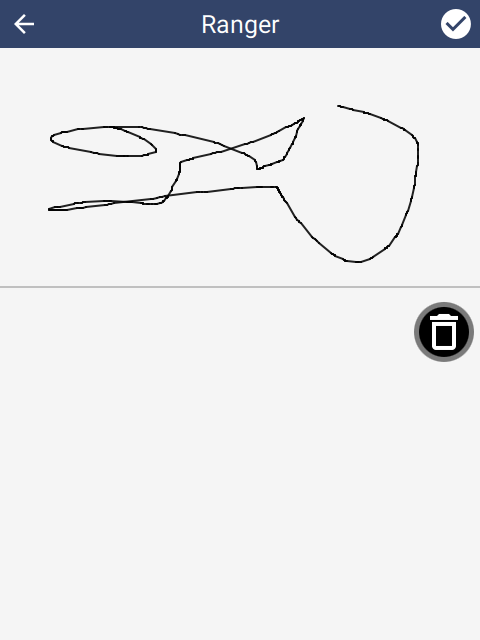 |
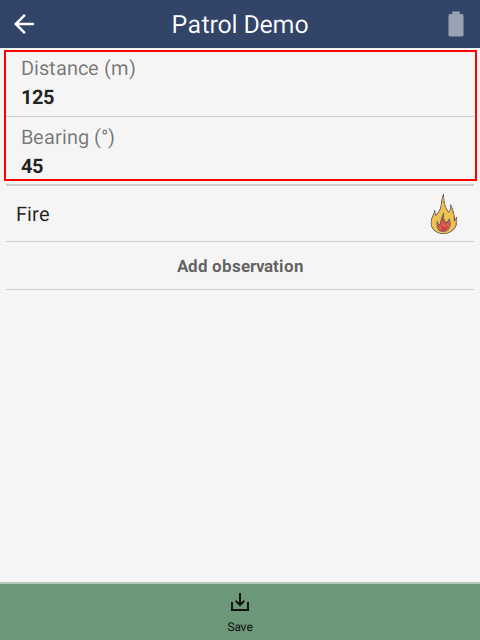
6.2.6.2. Distance and bearing
Checking Record distance and bearing shows two additional rows on the main sighting screen. These options will be interpreted by SMART desktop and relocate the position to a new location. In the example below, the fire is 125 meters away at a bearing of 45 degrees from North.
 |
6.2.6.3. Track observer
Checking Track observer shows an additional row on the main sighting page. This option allows selection of a specific observer (taken from the employee list) for each incident.
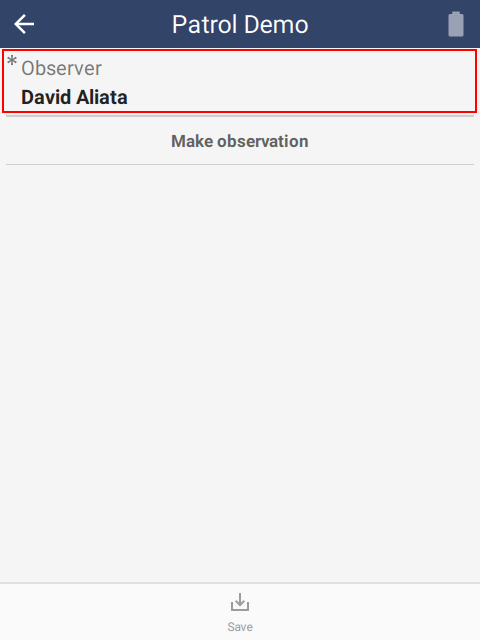 | 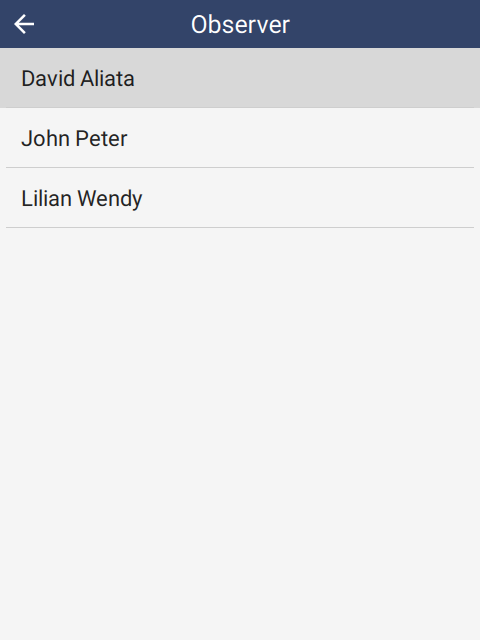 |
6.2.6.4. Distance and bearing, Track observer for Surveys
For Surveys, the Distance and bearing and Track observer settings are on the Survey Design page. These settings override the settings specified on the Field Data Options page (see 6.2.6.):
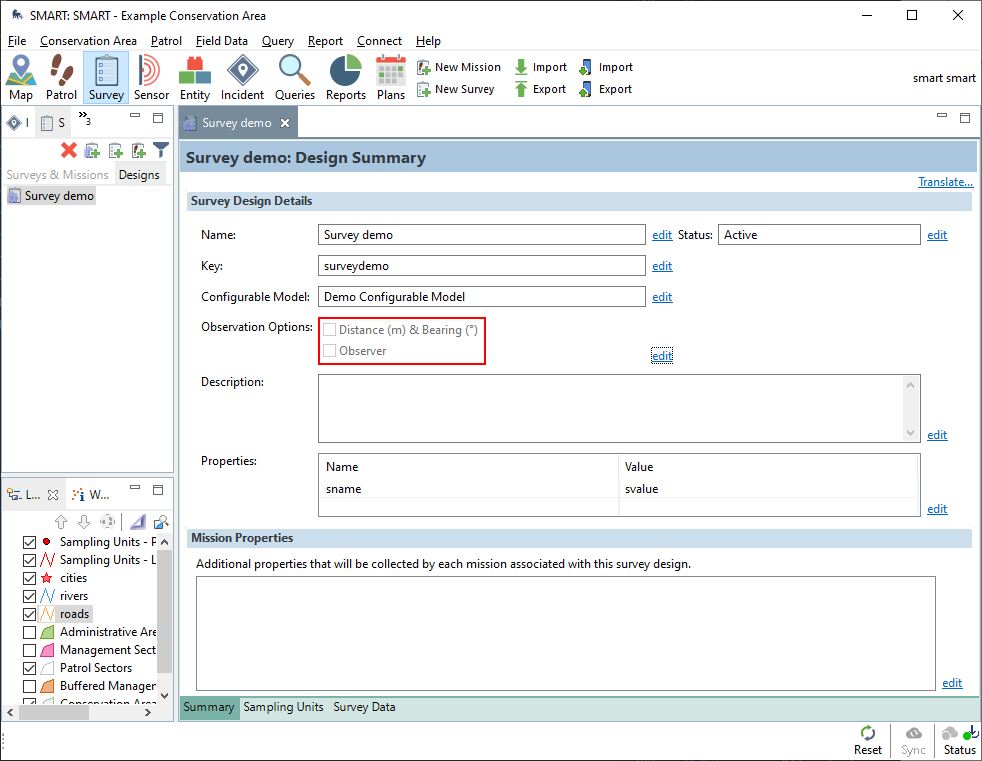 |
6.3. Packages
SMART Desktop creates a Package to define how data should be collected by SMART Mobile. This package is installed on the device and collects data for the desktop.
6.3.1. Package logo
The package logo can be set in the Logo section of the Conservation Area Properties dialog. This dialog can be reached from the Conservation Area menu.
SMART Mobile supports a logo in PNG, JPG or SVG format. SVG format is recommended, since it will look good at all screen resolutions.
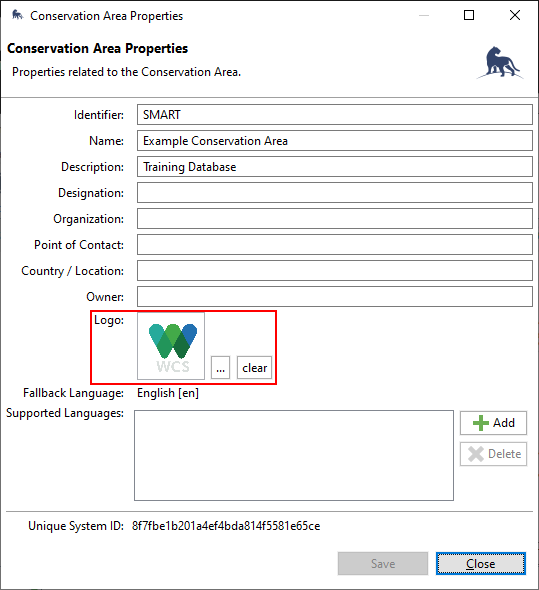 |
When viewed on the device, the logo will display alongside the Project title.
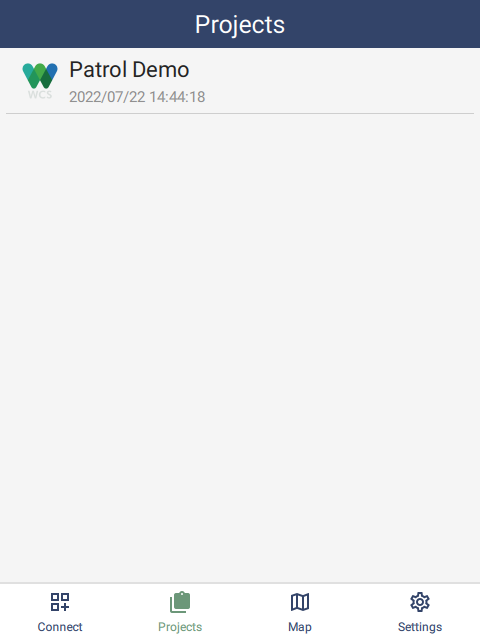 |
Note that all packages in a conservation area will share the same logo.
6.3.2. Package types
There are several different package types: Patrol, Survey, Collect & Independent incidents.
6.3.2.1. Patrol package
Patrol packages support the capture of a patrol. A Patrol is a collection of observations which are grouped together because they share certain properties. Patrols are configured on the desktop from the Patrol menu and the package itself supports numerous metadata properties, e.g. Transport Type, Team, Mandate, etc. Patrol packages also support independent incidents, which can be made during or outside of a patrol.
 |
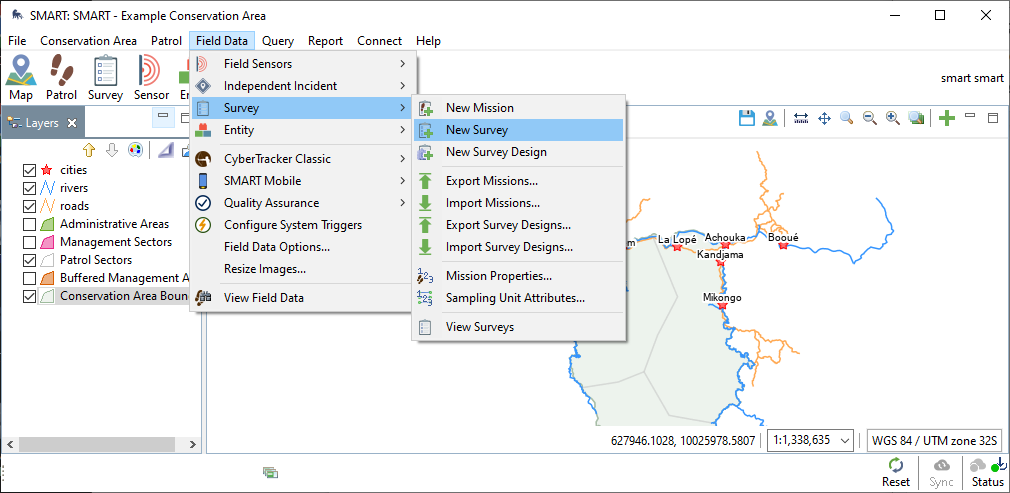
6.3.2.2. Survey package
Survey packages are similar to Patrol packages. They represent a collection of observations grouped together. Surveys can be configured from the Survey submenu off Field Data. Survey packages also support independent incidents, which can be made during or outside of a survey.
 |
6.3.2.3. Collect package
Collect packages are designed for public use and require users to be online. The SMART Mobile user interface is simplified and provides more limited configuration options.
6.3.2.4. Independent Incident Package
Independent incident packages support the entry of simple one-off observations. The SMART Mobile user interface disables Patrol and Survey options, but is otherwise identical.
6.3.3. Model settings tab
Model Settings are settings which apply to the entire package. These can be configured on the SMART Mobile Packages dialog. Note that Incident Configuration will only be displayed if the Independent Incident plugin is installed.
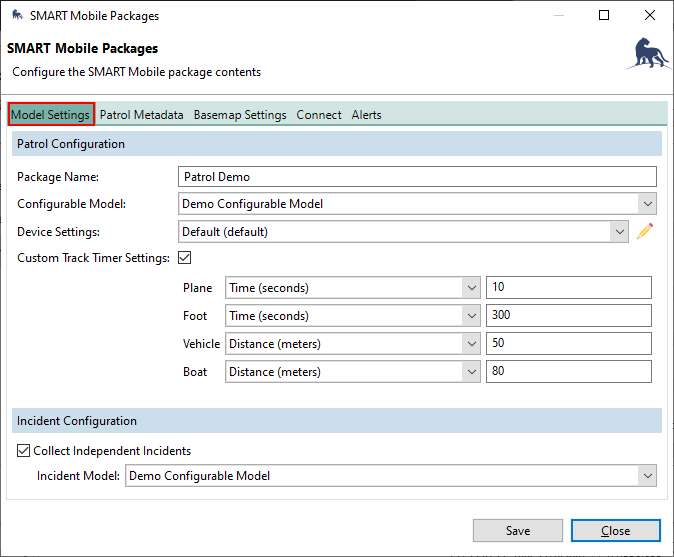 |
Custom Track Timer Settings allows customization of the track timer. The interval can be specified in meters or in seconds.
Example 1: an interval of 300 seconds means that a track point will be logged every 5 minutes. While infrequent this is appropriate for a slow moving party on foot.
Example 2: an interval of 50 meters means that a track point will be logged when the device has traveled at least 50 meters from the last logged point. This is useful for restricting the amount of data being logged.
The Distance interval generally uses more battery power, since the location must be constantly checked to see if the distance threshold has been reached.
The time interval should be longer the slower the transport type.
6.3.4. Patrol metadata tab
Patrol metadata is data that is associated with all the observations made in a patrol. Much of this data can be changed as the patrol progresses. For example, the mode of transport may change from foot to vehicle or employees may leave or join the party.
This configuration occurs at the package level:
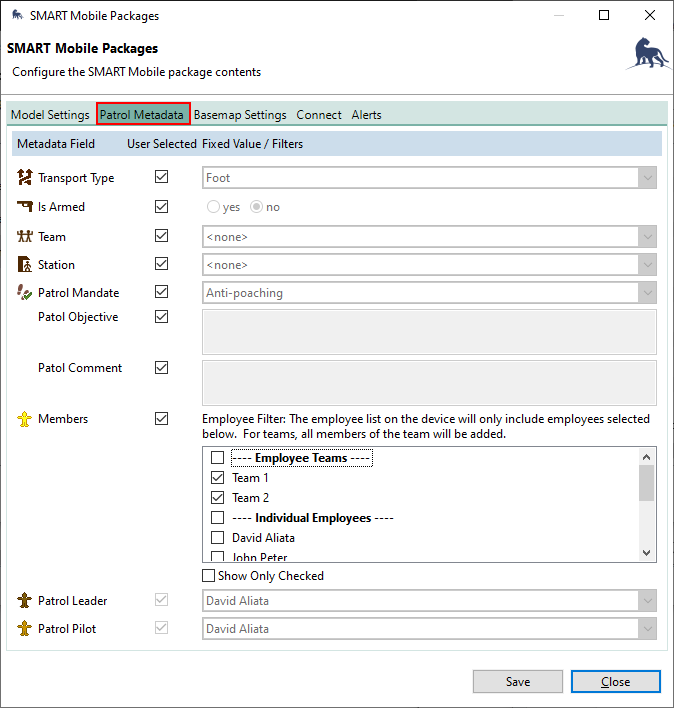 |
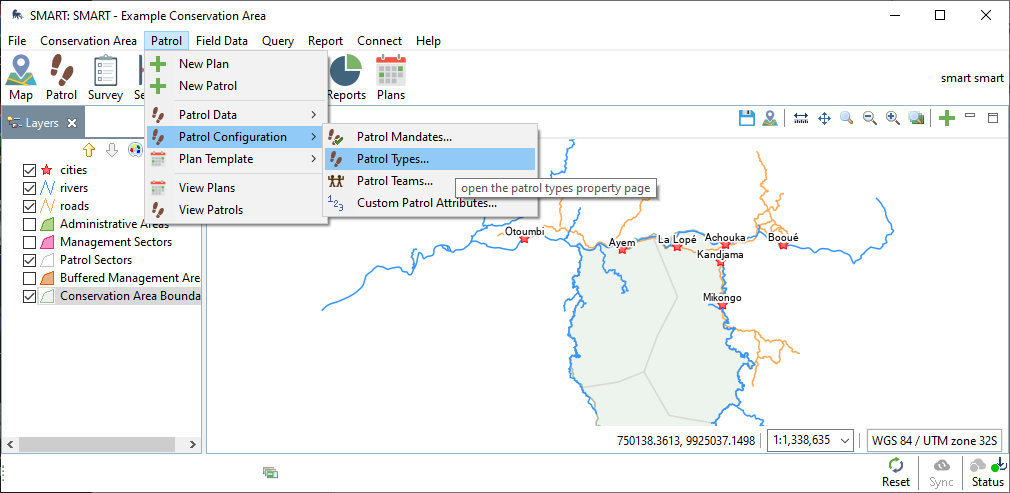
6.3.4.1. Transport type
Patrol transport types are defined on the Patrol Types & Transportation Options dialog. This dialog can be reached via the Patrol menu:
 |
The Transportation Types tab defines the various types of transportation that can be selected in SMART Mobile:
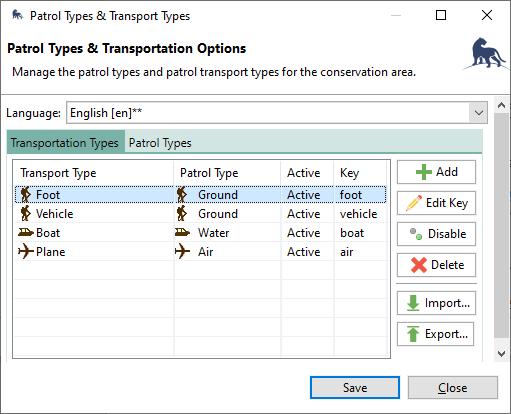 |
The Patrol Types tab shows the possible types along with the maximum expected speed. This speed value is used to detect bad GPS readings. GPS readings are occasionally (though rarely) incorrect by several thousand meters and this can be detected if the reported speed from the GPS is very different from the expected speed of travel.
For example, if the GPS reports a ground speed of 1000 km/h while on foot, the location value will be excluded with the message “GPS Outlier detected”. If this message is showing up unexpectedly, then it is likely that the transport type has not been selected properly.
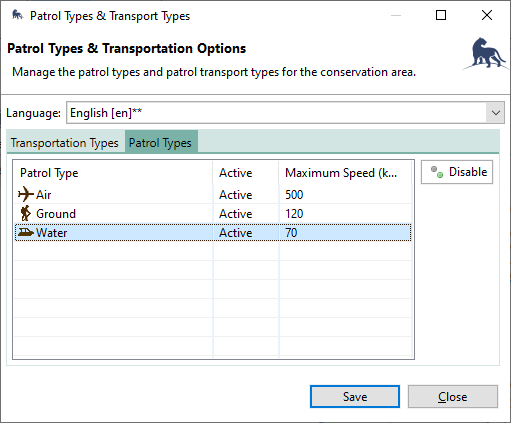 |
6.3.4.2. Armed
Armed is a BOOLEAN attribute. Once set for a patrol, it cannot be changed for the duration of the survey.
6.3.4.3. Team
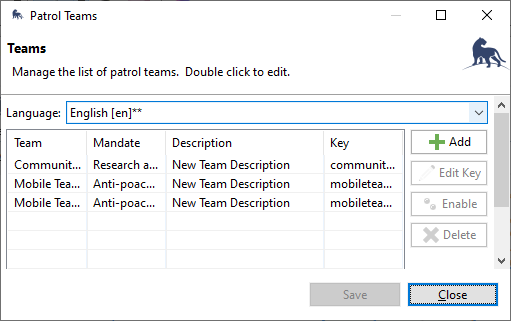
Patrol teams are defined on the Patrol Teams dialog, which can be reached via the Patrol menu:
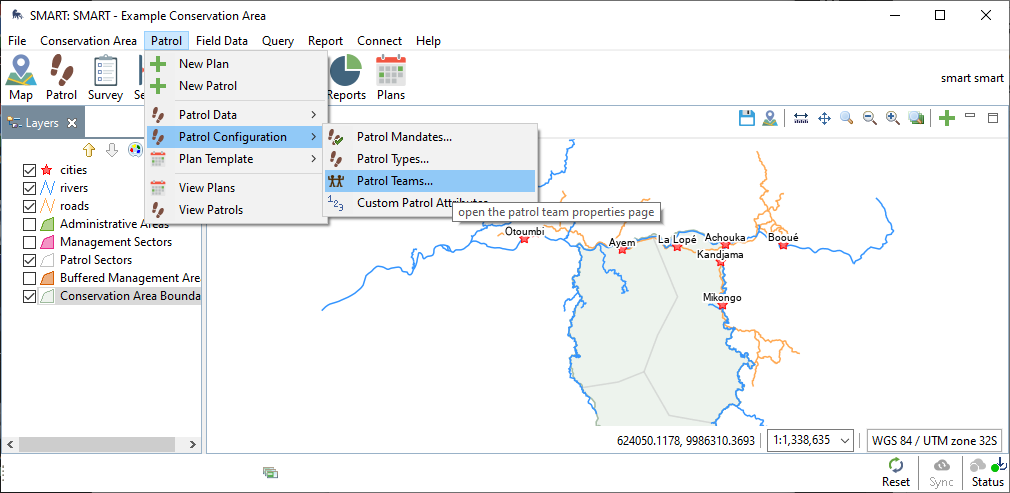 |
 |
6.3.4.4. Station
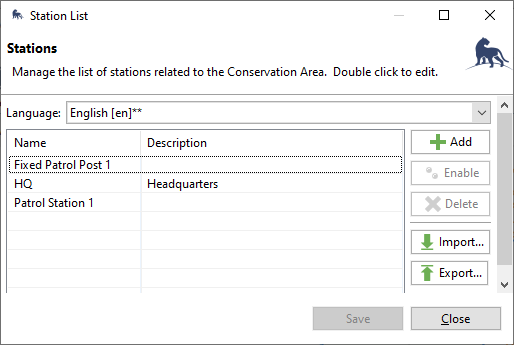
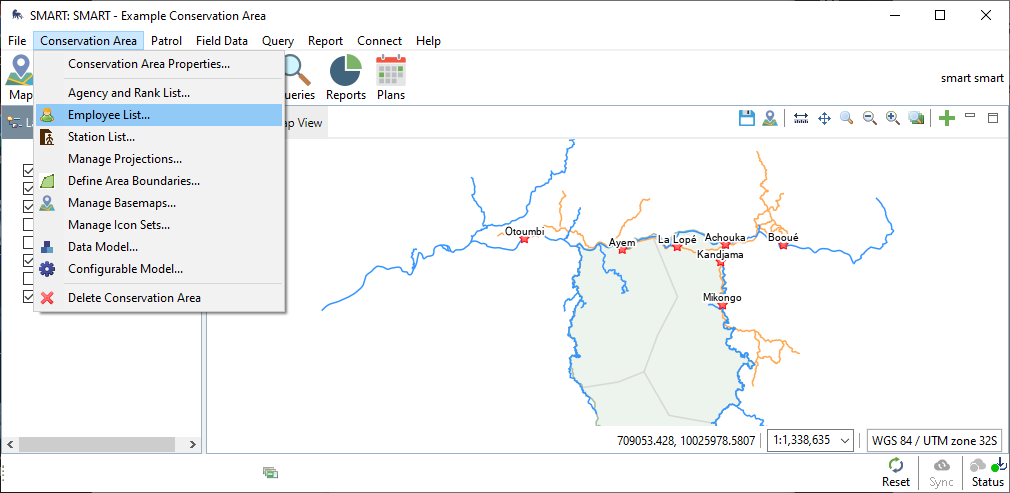
Stations can be specified on the Station List dialog. This can be reached via the Conservation Area menu:
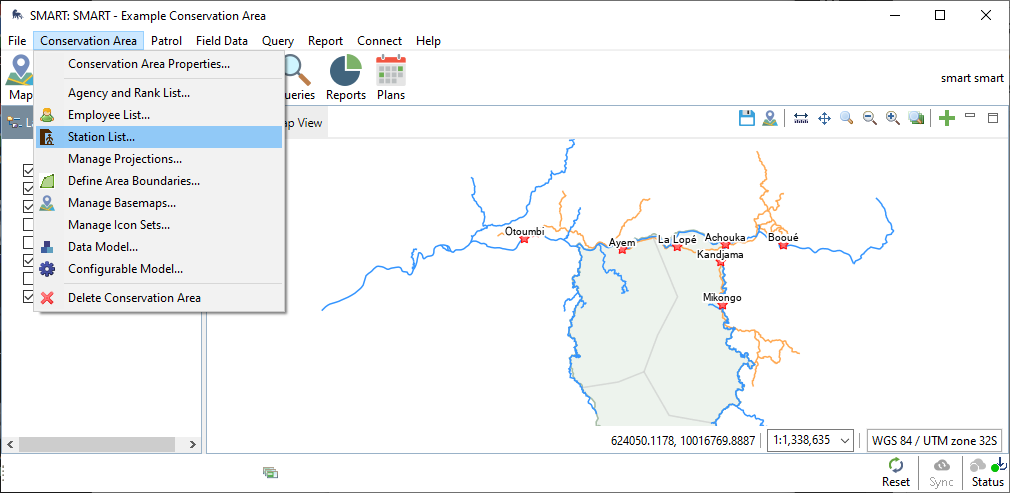 |
 |
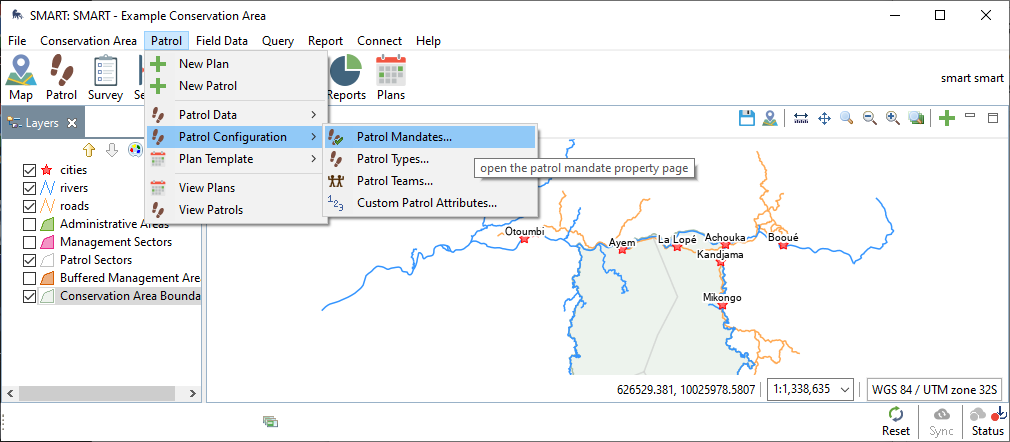
6.3.4.5. Mandate
Mandates can be specified on the Patrol Mandates dialog. This can be reached via the Patrol menu:
 |
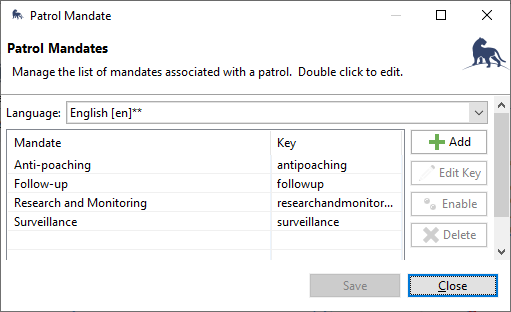 |
6.3.4.6. Objective
Patrol Objective is a freeform text attribute.
6.3.4.7. Comment
Patrol Comment is a freeform text attribute.
6.3.4.8. Members
Employees and their teams can be specified using the Employees dialog. This dialog is available via the Conservation area menu:
 |
Employees may also belong to one or more teams. This can be specified on the Employee Teams tab:
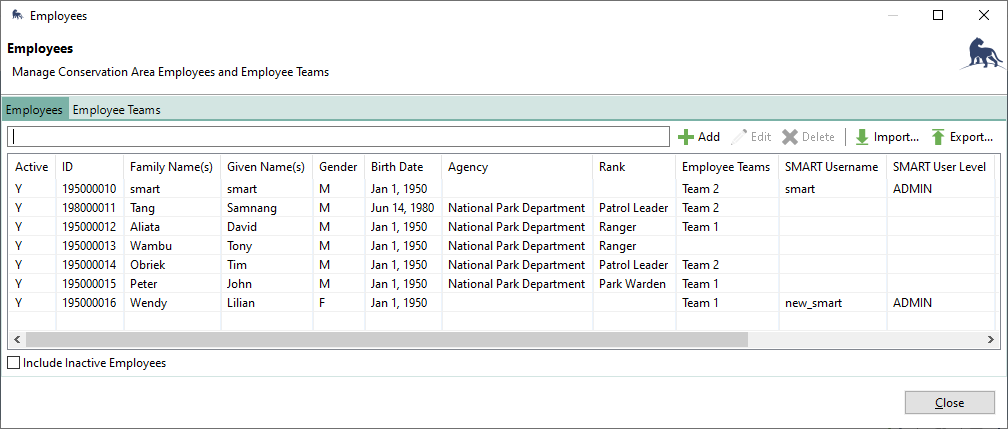 |
When specifying employees, teams will be listed first. This is primarily used to help find team members quickly:
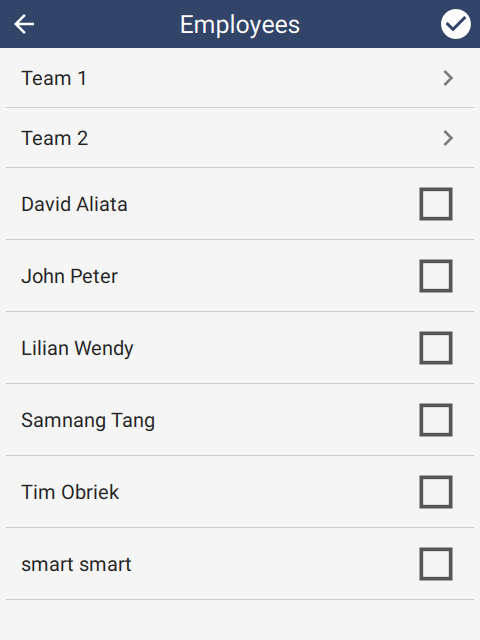 |
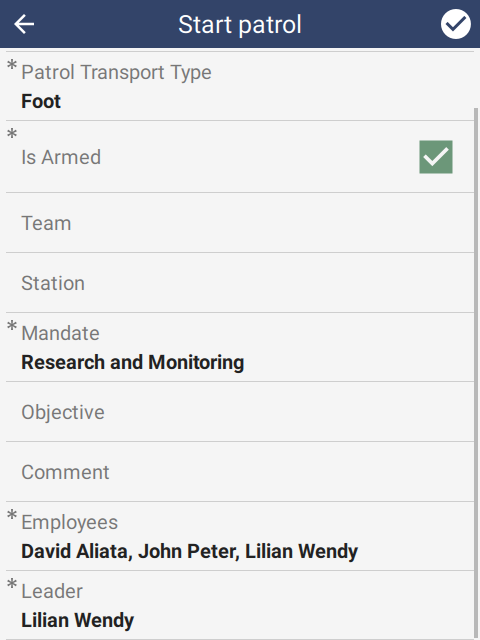
6.3.4.9. Leader
After the employees have been specified, the Patrol Leader attribute can be set. Note that the leader must be one of the employees in the employee list. If the leader is set and then that employee is removed from the list of employees, they will be removed from the leader attribute.
 |
6.3.4.10. Pilot
If the Patrol Transport Type attribute is set to Water or Air, then a Patrol Pilot attribute will become visible. Similar to the Leader attribute above, the pilot must be a member of the selected employees.
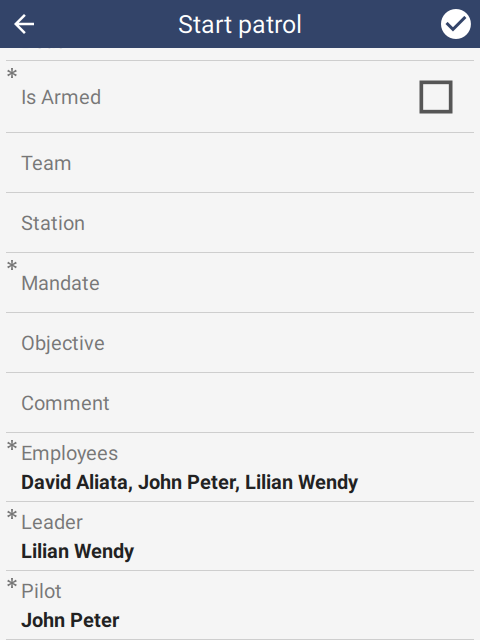 |
6.3.5. Basemap settings tab
SMART Mobile supports offline map layers, i.e. maps that work without a network connection. These are configured on the Basemap Settings tab of the SMART Mobile Packages dialog.
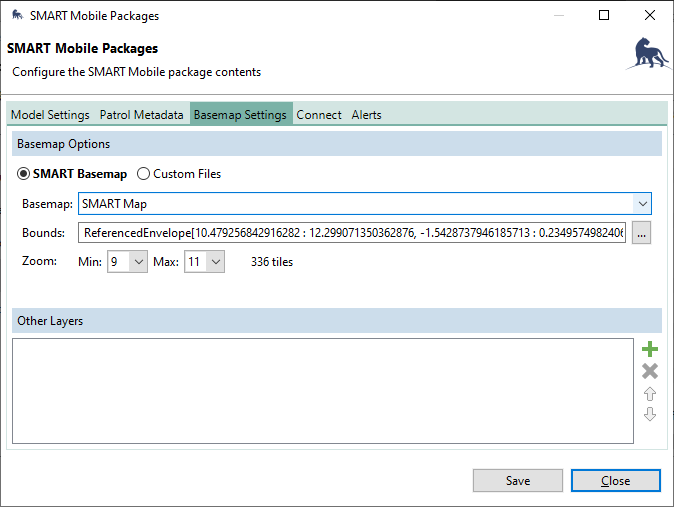 |
The SMART Basemap option will automatically generate an offline map from the SMART Desktop map view. In order to support high resolution and zooming, the map is captured at different zoom levels and segmented into tiles. More zoom levels means more tiles. The recommendation is to experiment with different zoom levels until the resolution is good enough and the map is reasonably sized:
 |
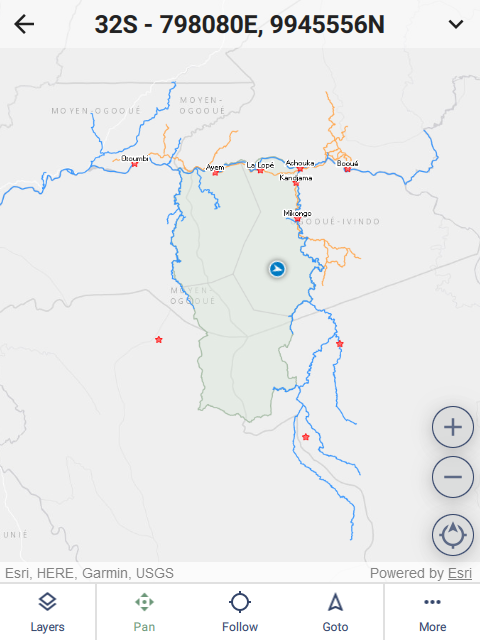 | 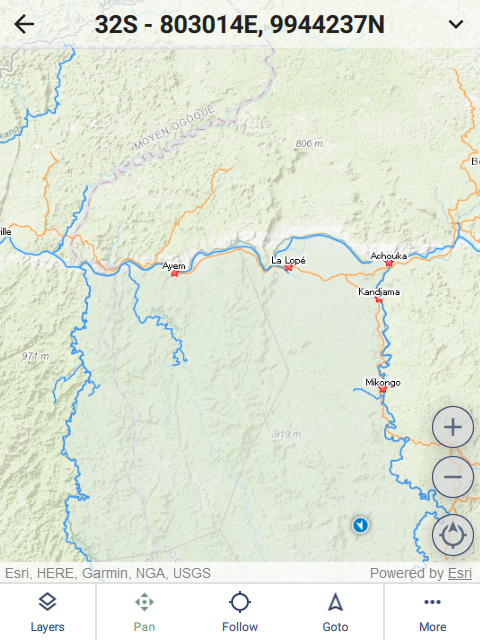 |  |
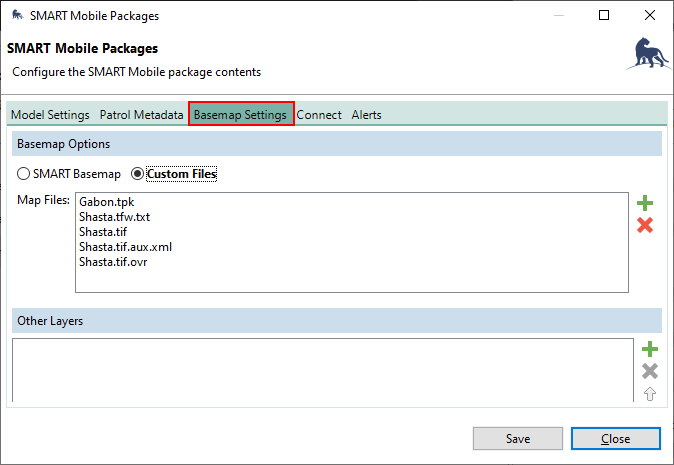
6.3.5.1. Custom files
If existing map files are available, then these can be used directly by selecting Custom Files. SMART Mobile supports SHP, GeoTIFF, ArcGIS TPK, ArcGIS VTPK, PNG, JPEG and KML.
 |
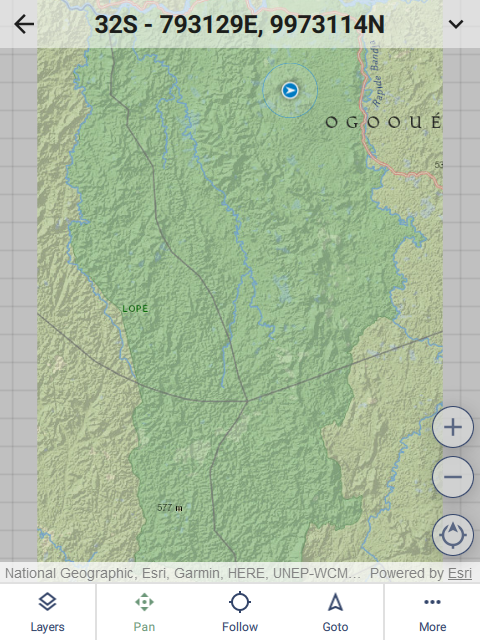 |  |
6.3.5.2. Other layers
SMART Mobile supports online Web Map Service layers. More information on this type of layer: https://en.wikipedia.org/wiki/Web_Map_Service.
For example, a weather layer:
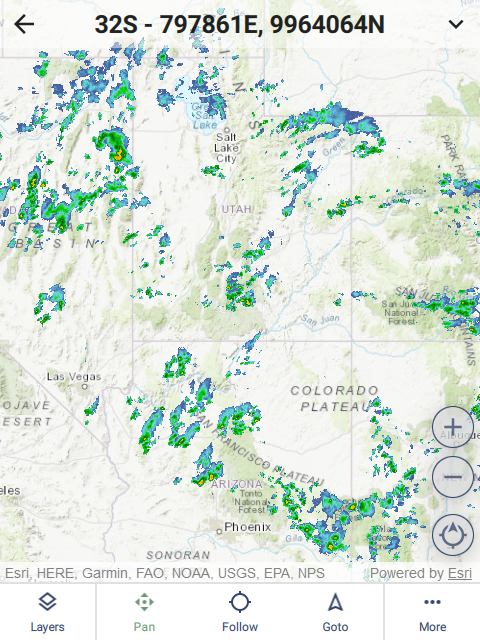 | 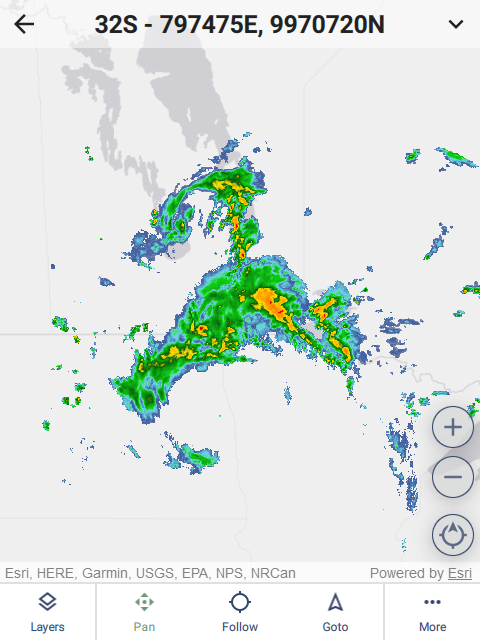 |
6.3.6. Connect tab
SMART Mobile can be configured to upload data to a Connect server. The Connect tab contains several configuration settings for this scenario.
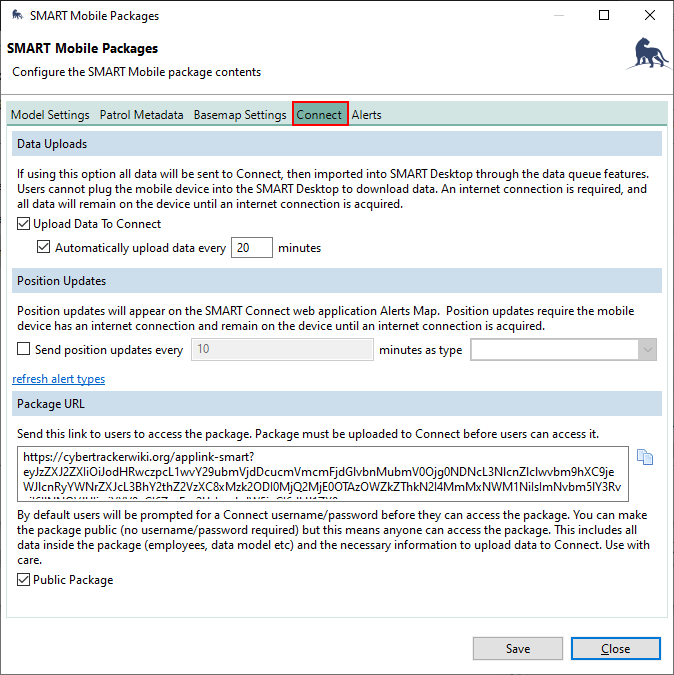 |
6.3.6.1. Data uploads
Data uploads respect the Upload requires WiFi setting.
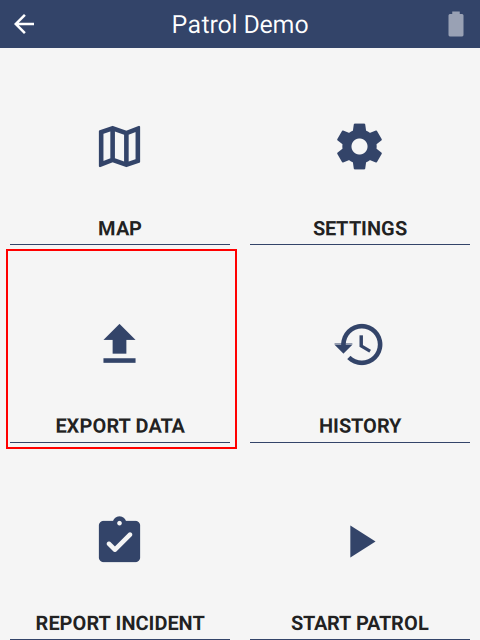
If Upload Data To Connect is checked, then the data is expected to be automatically uploaded to the Connect server over the network. Export data will send any data that has not already been sent and also clear the history.
If Upload Data to Connect is unchecked, then the data is expected to be retrieved from the device over a USB cable. Export data will create one or more json files which can be downloaded from the desktop.
If Automatically upload data every n minutes is checked, then data will be sent to the server at regular intervals. While the data reaches the server more quickly with this approach, it cannot be edited after saving.
If Automatically upload data every n minutes is unchecked, then data will not be sent to the server. Export data will send all data to the server at once. An advantage of this approach is that incidents can be edited before they have been sent to the server.
 |
6.3.6.2. Position updates
Position updates are treated as data uploads and respect the Upload requires WiFi setting.
If Send position updates every n minutes as type X is checked, then SMART Mobile will send a location to the Connect server over the network at the specified interval. This is useful for tracking the last known location of the device.
6.3.6.3. Package URL
The Package URL is a link to the package on the Connect server. See section 7.1 on Package Installation.
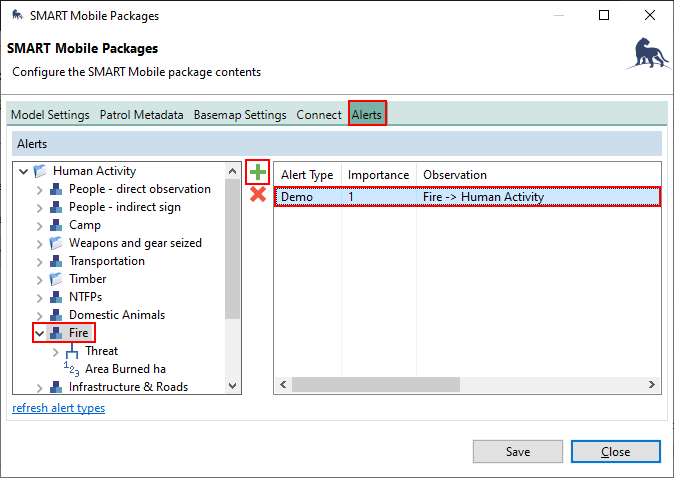
6.3.7. Alerts
Alerts are treated as data uploads and respect the Upload requires WiFi setting.
When an incident is saved, each of the observations within it are matched against the list of alerts. For example, if a Fire observation is made, then an event is sent to the Connect server as soon as it is saved:
 |
Alerts can be viewed on a map in real-time:
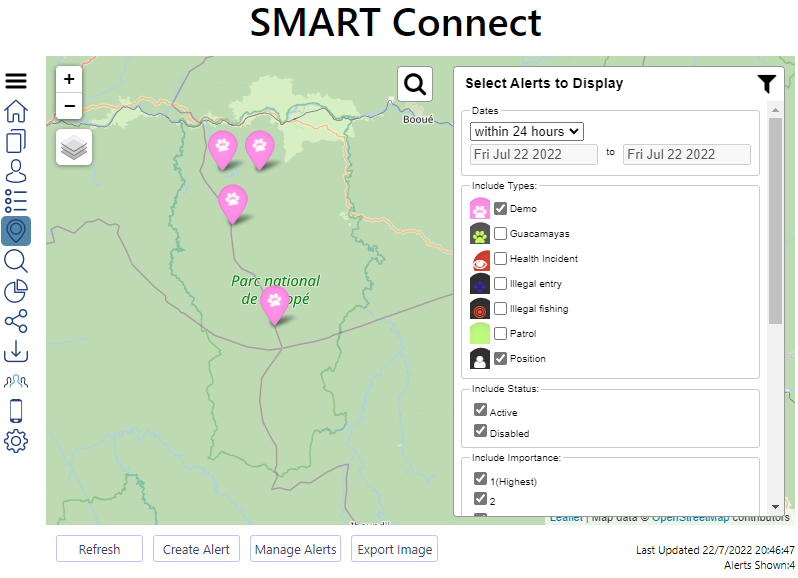 |
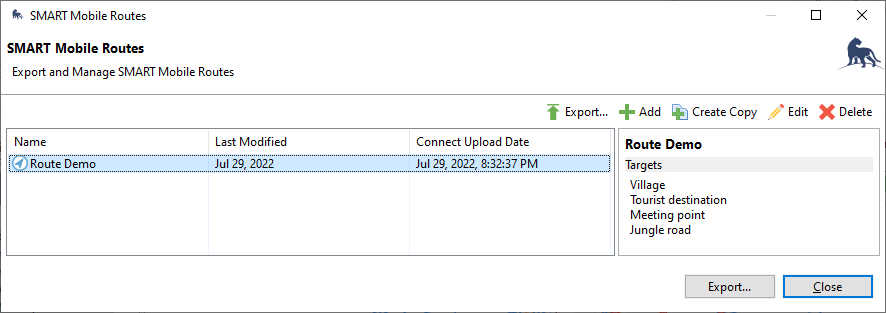
6.4. Routes
Routes are points and lines which can be overlaid on a map. They typically represent points of interest or paths which need to be followed. The Routes… menu will open the SMART Mobile Routes dialog.
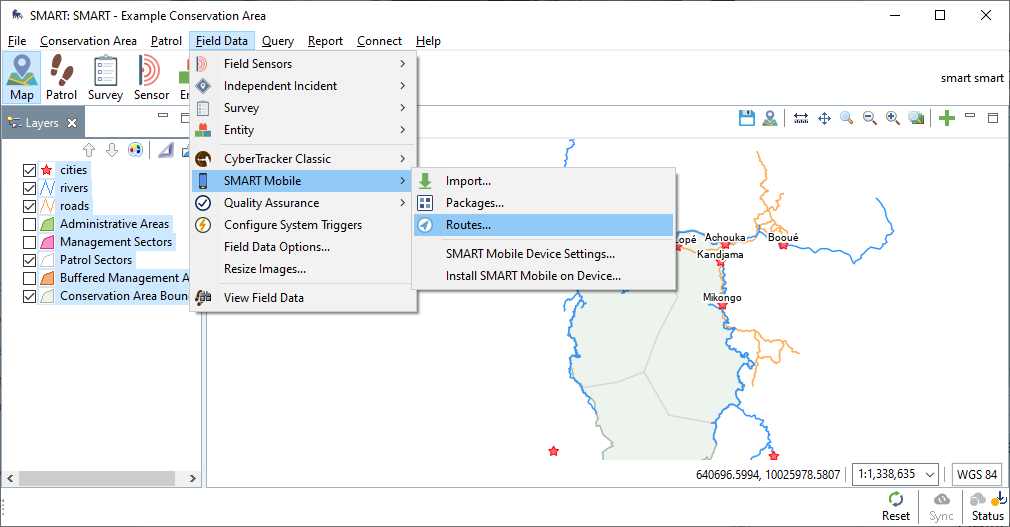 |
Routes work in the same way as Packages - they can be exported to a device using a USB cable or a Connect server.
 |
They can also be exported at the same time as a Package using the Export SMART Mobile Packages dialog:
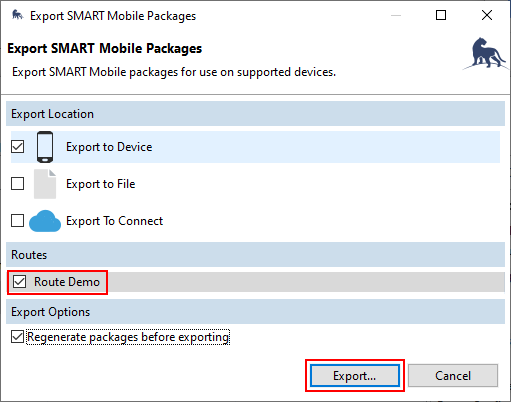 |
6.4.1. Creating route points and lines
Routes are composed of points and lines. These can be configured on the Route editing dialog (clicking Edit on the SMART Mobile Routes dialog):
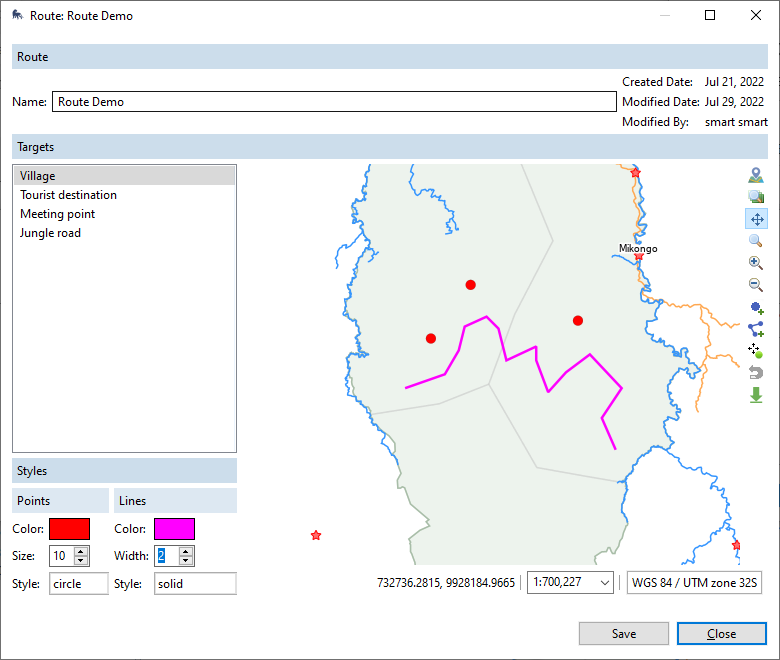 |
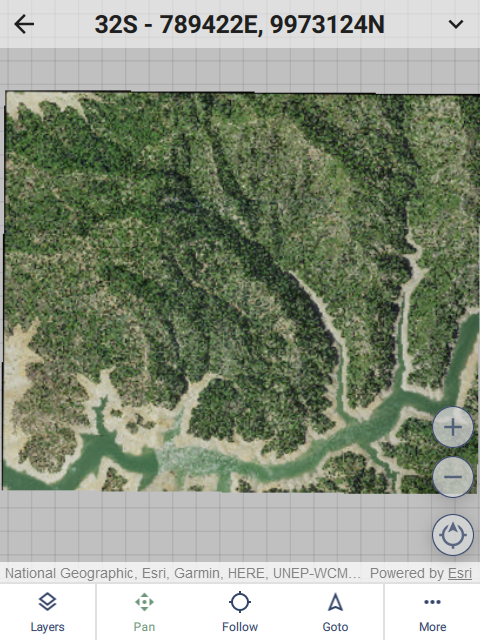
6.4.2. Viewing routes
Routes are visible in SMART Mobile on the map. They can be enabled and disabled on the Layers page. More information on routes can be found in the Map section.
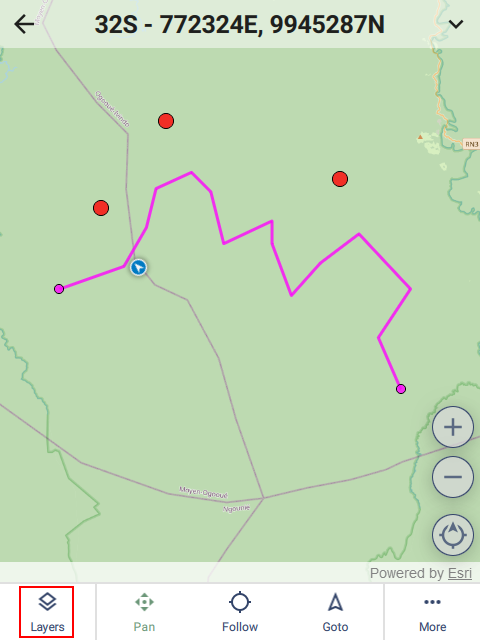 |  |
6.5. Device Settings
Device Settings are part of the SMART Mobile configuration. These can be reached from the SMART Mobile Packages dialog or from the SMART Mobile menu. It is possible to have several different settings profiles for different scenarios.
 |
6.5.1. General tab
The General tab provides options for high level SMART Mobile functions.
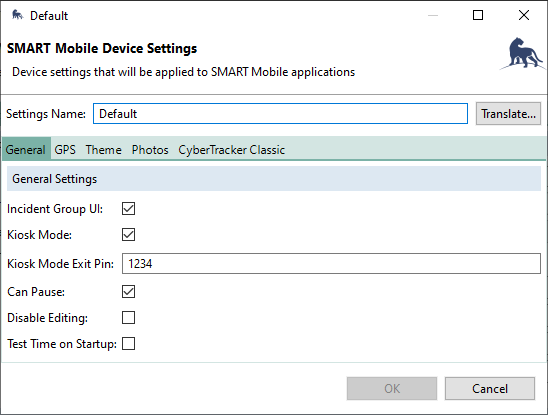 |
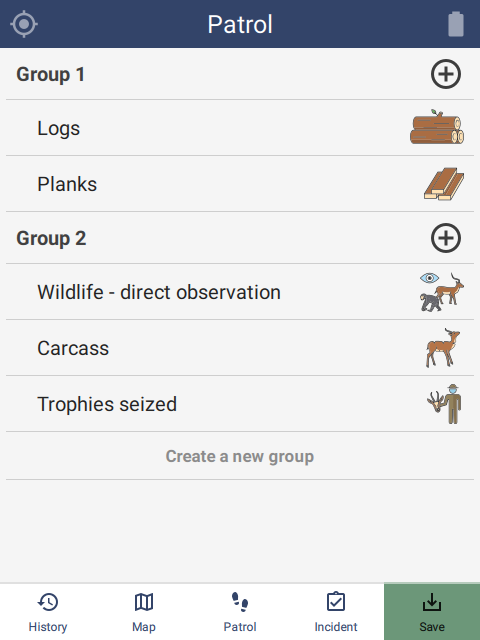
6.5.1.1. Incident group UI
Incident Group UI is a way to create observations which are grouped together. When checked, the observation page shows groups. Tapping the + icon adds an observation to an existing group. Tapping on Create a new group will add a new group to the list.
In order to remove a group (and all observations in it), swipe left on the group row and tap YES to delete it.
 |  |
6.5.1.2. Kiosk mode
This option is described in section 4.
6.5.1.3. Kiosk mode exit pin
This option is described in section 4.
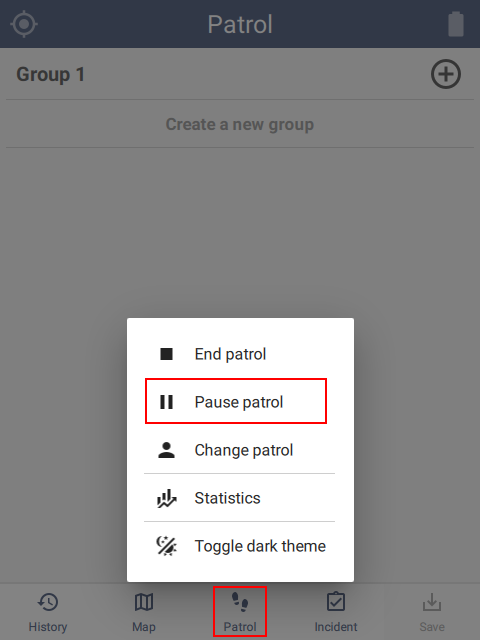
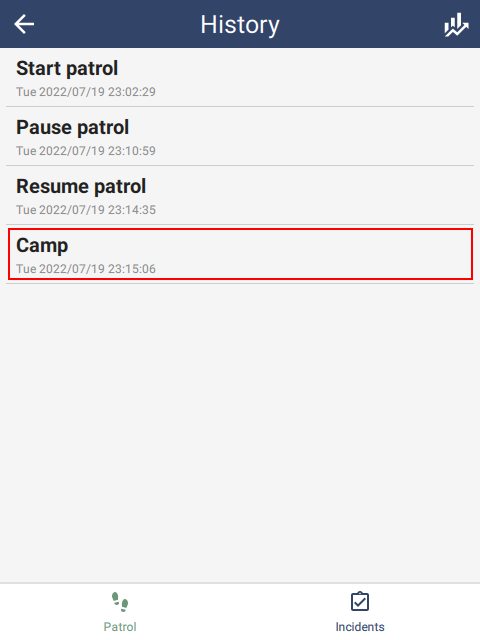
6.5.1.4. Can pause
Both Patrols and Surveys can be paused. This option appears on the Patrol popup menu if the Can Pause option is checked. Note that the icon in the bottom right of the home screen changes to Resume Patrol.
Data cannot be exported while on patrol. The patrol must first be resumed and then stopped.
 |  |
6.5.1.5. Disable editing
Before data has been exported, it can be edited. However, editing can be disallowed by checking this option.
Editing is done by navigating to the history page and selecting the observation to be edited. Then tap the pencil in the top right corner of the screen. From there the observation can be edited as usual.
When editing is complete, tap the highlighted check mark at the bottom of the screen. The X button cancels the edit operation.
 | 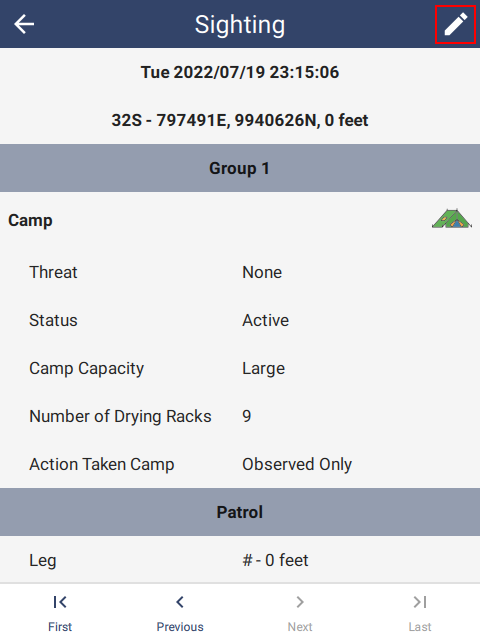 | 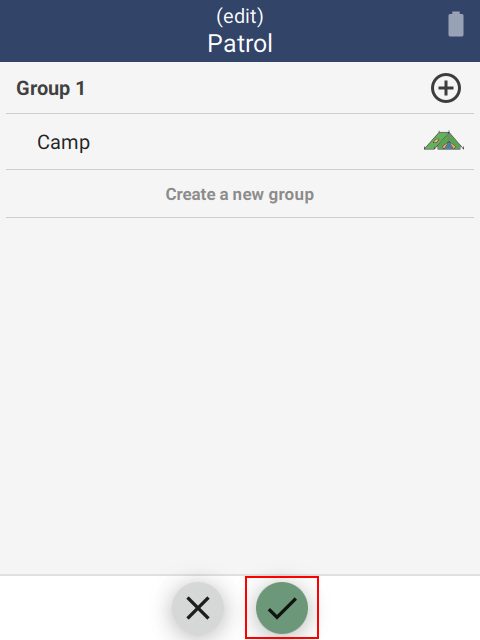 |
6.5.2. GPS tab
The GPS tab contains settings related to GPS behavior.
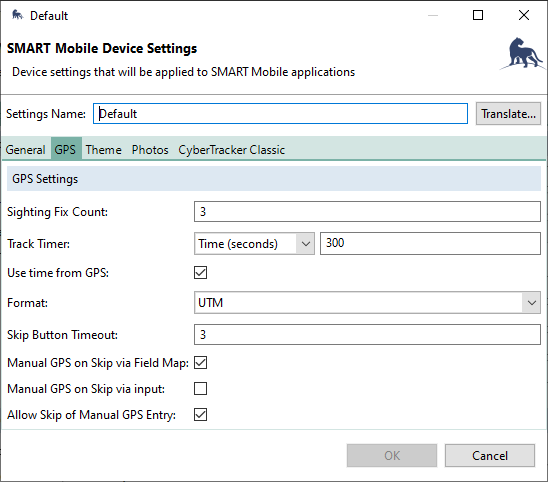 |
6.5.2.1. Sighting fix count
Sighting fix count is the number of GPS readings to discard after powering it on. On many devices, the first readings of the GPS are stale or sometimes wildly inaccurate. Waiting for a few readings to come through first generally improves location quality.
6.5.2.2. Track Timer
The Track Timer interval is specified here. This will be overridden by the Custom Track Timer Settings if they are provided. Note that the interval can be in time or distance. A distance interval will have a higher battery cost, since the GPS must remain on to determine when the distance threshold has been crossed.
6.5.2.3. Use time from GPS
For devices that are never connected to a network, the time is likely to be incorrect. If Use time from GPS is specified, then SMART Mobile will attempt to use the GPS time rather than the device time.
The message Waiting for time correction is displayed while waiting for the first GPS reading to be found.
6.5.2.4. Format
GPS location can be displayed in Degrees Minutes Seconds, Decimal Degrees or UTM. Format also affects the format of manual location entry.
6.5.2.5. Skip button timeout
Taking a reading from the GPS can be skipped. This is usually done when the satellite signal strength is so weak that waiting for a fix would take too long. It can also be used when a location is being reported from another person or device. The Skip button timeout controls how many seconds to wait until the Skip GPS button is visible. The delay is intended to prevent accidental tapping as well as to encourage users to wait until the GPS has a fix.
To disable the Skip button altogether, set the timeout to 0.
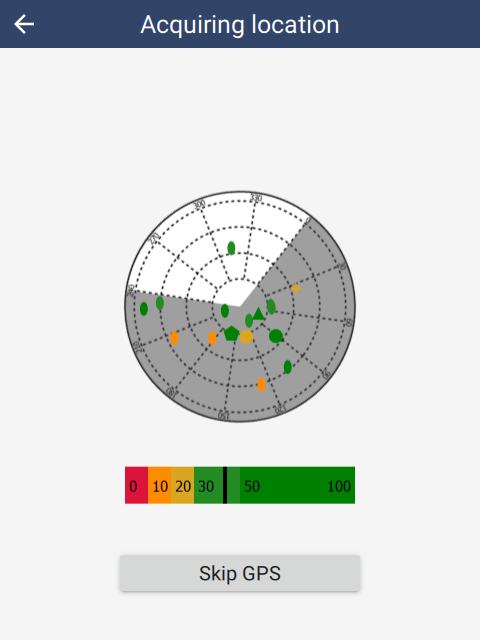 |
6.5.2.6. Manual GPS entry
If both Manual GPS on Skip via field map AND Allow skip of manual GPS entry are unchecked, then Skip GPS immediately completes the observation. If no GPS fix is available, then (0, 0) is used. However, if even a partial reading is available, then that will be used.
If either Manual GPS on Skip via field map OR Allow skip of manual GPS entry are checked, then Skip GPS will show the Manual GPS location screen.
6.5.3. Theme colors
SMART Mobile uses Material design styling and colors: https://en.wikipedia.org/wiki/Material_Design
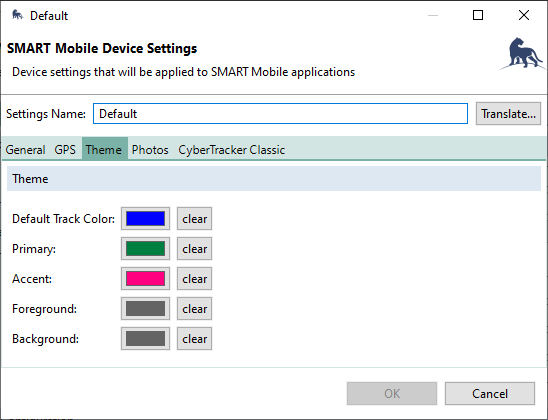 |
The colors are defined as:
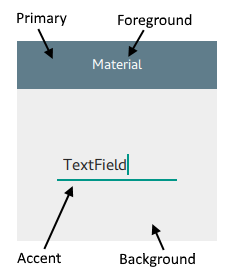 |
Note that currently Foreground and Background are ignored, so that the Dark mode feature functions correctly.
6.5.4. Photos
See Additional Photo Settings in the Configurable Model chapter.